Day 6 – Top vent slots, front door latch and more painting.
I cut some slots in the roof of the cabinet for ventilation, not sure they are really needed.
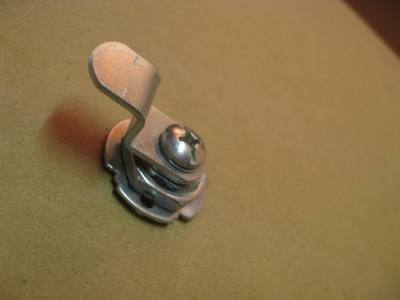
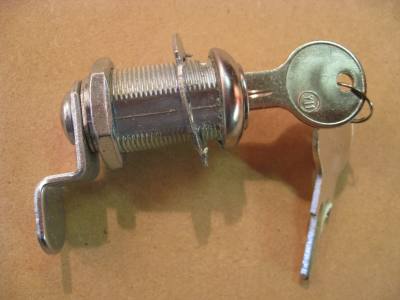
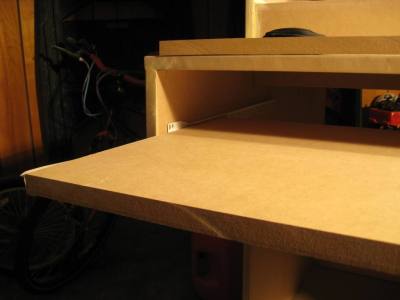
I had planned on making the front area at the bottom a door with hinges and such, but I decided I didn’t want to mess with figuring out where to put them and all that. Instead I just have the bottom area as a solid piece that I put a cam lock in middle top and then cut out a slot in the 2×4 that sits behind it. This way I can totally remove the front if I want to.
I might change this later and put hinges and all on it, but for now I like how it works.
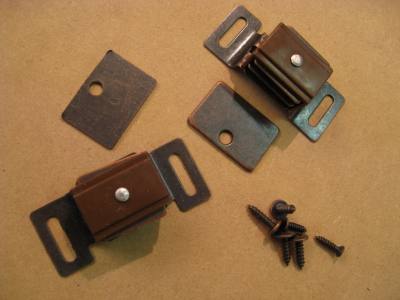
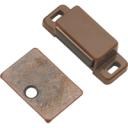
In addition to the cam lock I’m putting some of these cabinet magnetic catches along the bottom inside to make sure it doesn’t easily come out.
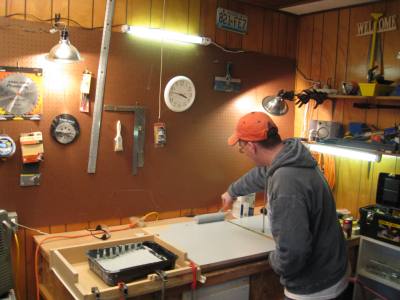
I love building, I love cutting and drilling and sanding and routing and glueing and all of that. But, I hate painting. It’s boring, it’s tedious and it seems to take forever. ehhhh, I hate painting.
Day 6 hours: 4 hours
Running total: 26 hours construction.
Day 5 – First test drive, added inside shelf and holes for wires.
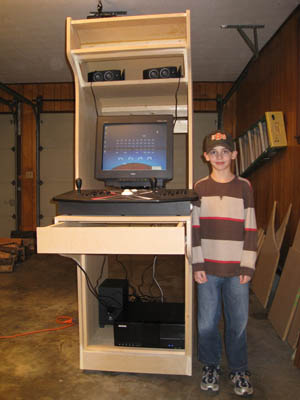
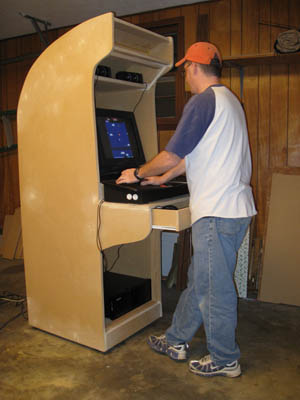
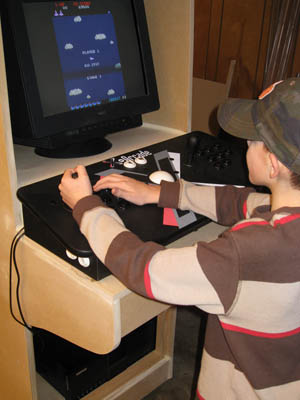
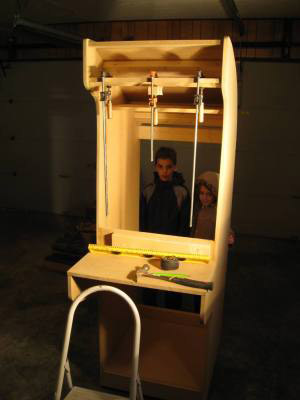
I put my computer, monitor, speakers and the controller onto the cabinet for a test drive.
Here I am playing TimePilot. One of my favorite games.
I could have sat there for hours doing that.
So you can get an idea of size.
(FYI…I’m 6′ tall)
It was fun, but I found a couple of things I needed to tweak:
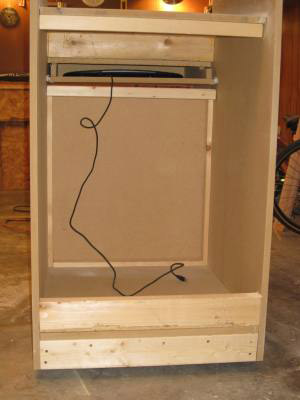
1. No holes for wires coming down from speaker/marquee area.
2. No hole for wires from controller.
3. Plenty of storage space in the bottom area, but needs a shelf.
4. The controller doesn’t sit flat, not sure if that’s the controller or the shelf.
5. The whole cabinet is a bit wobbly. I don’t think it’s structural, I think it’s the wheels and maybe my garage floor isn’t totally flat?
Might need to beef up the wheels or remove them all together.
6. The monitor is a bit wobbly as well. I think it’s the plastic stand. I’m really hoping to find a 25″ or 27″ TV to put in it, but haven’t yet.
The 19″ monitor is pretty good size, but not quite as big as I want.
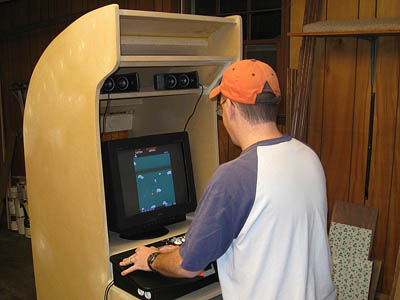
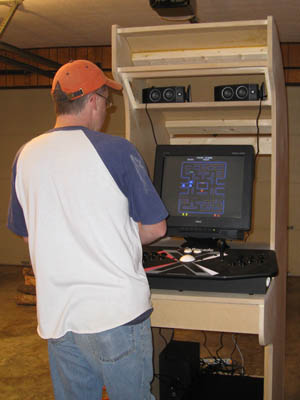
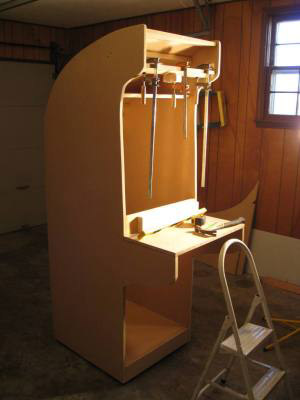
Some more pictures of us playing…
Here I am playing one of the greatest games ever created.
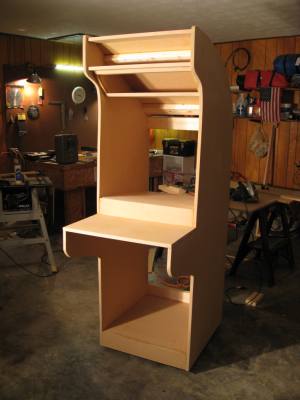
Ok, so I fixed the missing wire holes, added a shelf to the bottom area and did some more sanding.
Did I mention that sanding this thing generates tons of sawdust? Man, it’s everywhere.
Everything in my garage has a coat of dust on it. I keep opening the garage door and trying to blow it outside, but it’s cold out so I can’t leave it open long!
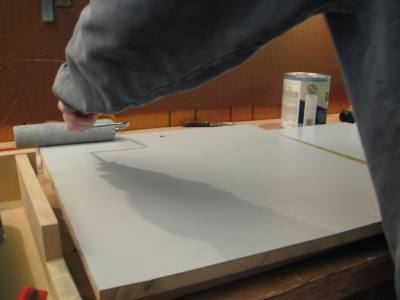
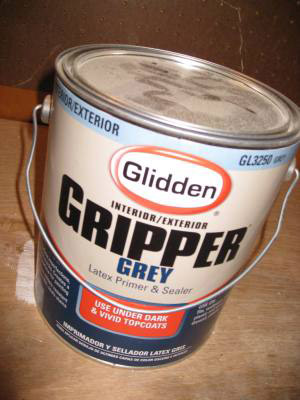
So, here it is with the beginnings of a coat of primer.
The further along I get in this the more fun it gets!
It’s New Years Eve, so I guess I’ll have to finish this next year!
Be safe tonight!
Day 5 hours: 3 hours
Total hours so far: 22 hours (That’s just building the cabinet, much more in the software side. I’ll talk more about that later)
Day 4. It’s a couple of days after Christmas. Every time I pull into my garage and see the cabinet I want to get to working on it, but there are only so many hours in the day!
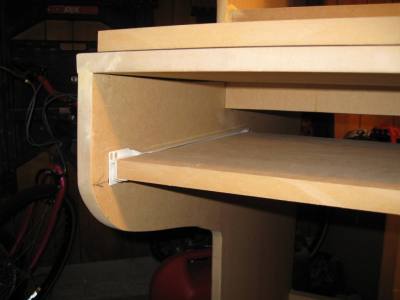
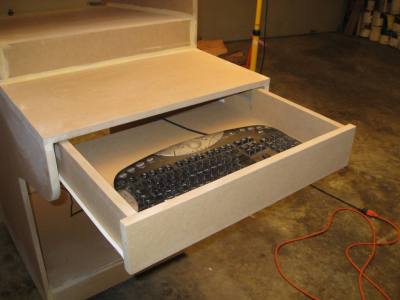
So, today I filled in the screw and nail holes with wood putty. Wood putty is great stuff, it covers a bunch of bad cuts! I also built and installed the drawer where the keyboard and mouse and such will go. In addition I cut and framed the opening at the base that will hold the coin slots and give access to the computer and other consoles.
The drawer was a bit tricky because I wasn’t really sure how I was going to do this part. Many of the cabinet plans I’ve looked at had the drawer that came out and then the front of the drawer was hinged so create a more flat area. I decided to just make it more of a regular drawer with sides and attach the front because I don’t figure I’ll be using the keyboard and mouse very much. It really should only be used for troubleshooting and such anyways. I’ll have the computer on the network so I’ll be able to remote to it to do more extensive work if I need to.
I got the drawer hardware from Home Depot for about $7 for both sides. It comes in different sizes and I got the 18″ set. It went together easily. Remember when cutting the actual bottom of the drawer that it will have to be about 1″ short of the inside depth to make room for the drawer hardware. In the shot below I haven’t made the rest of the drawer yet, all it has is the bottom of the drawer basically. I’ll add the front and some sides later.
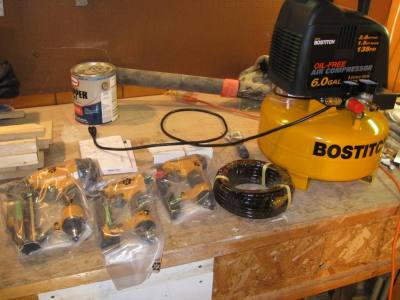
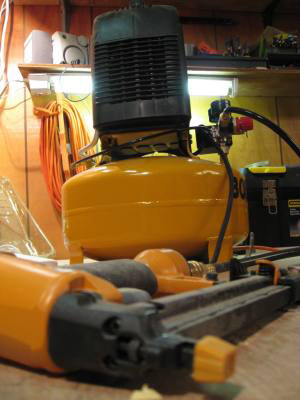
So, I was talking about tools and how much easier the nail gun my brother-in-law brought over made things. Well guess what I got for Christmas? A nail gun! Whoo hoo! So it came with a compressor, 2 nail guns and a staple gun. Oh and it’s cool!
Here it is with the drawer built.
Here it is from the front with the drawer closed and the front on the bottom area.
From the back…
Grey primer…
Another shot of the nail gun and compressor…
This stuff covers up a bunch of mistakes!
Here it is at the end of Day 4. The white patches is just dust.
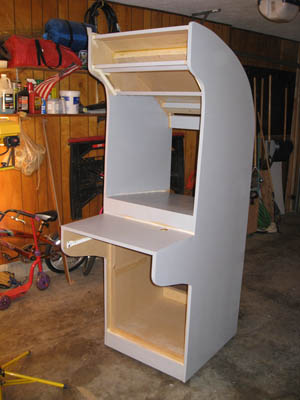
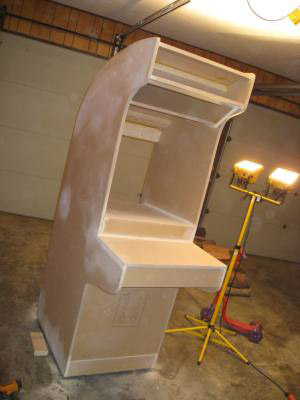
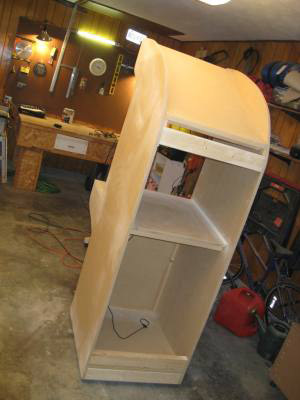
Day 3…I added the speaker shelf, marquee supports and the monitor shelf.
The area at the very top will have a fluorescent light that will illuminate artwork sandwiched between 2 sheets of plexiglass. You can buy the marquees and other cool artwork from MameMarquees.com. I might end up going that route, but I don’t want to spend huge amounts of money on this thing! We’ll see.
So, I added the upper support area and glued and clamped it.
Here’s my kids hanging out watching me work. And asking me a thousand times when it’s going to be finished so they can play with it!
A different angle.
In the next picture you can see the area where the speakers will go. Just below the marquee at a 45 degree angle will be a thinner piece that will support the speakers. I think I will also put a power button and reset button for the PC on that panel as well.
Here you also see the area for the monitor to rest. I raised it a bit from the original plans and I tilted it slightly downwards. I currently have a 19″ monitor to use with the cabinet, but I made the opening big enough to fit a 25″ or 27″ TV in it. I want to put a switchbox and be able to put a PS2 or other gaming consoles into the cabinet as well. From what I’ve read a TV actually works better for the old arcade games because of refresh rates and such compared to an actual computer monitor. I made sure to put a video card in my computer that has s-video out, so that when I get a TV to use it’ll connect using the s-video.
I really wanted to work some more on this today, but tommorrow is Christmas eve so I guess it’ll have to wait! :)
Alright! Day 2. My brother-in-law came over and brought a bunch of his cool power tools.
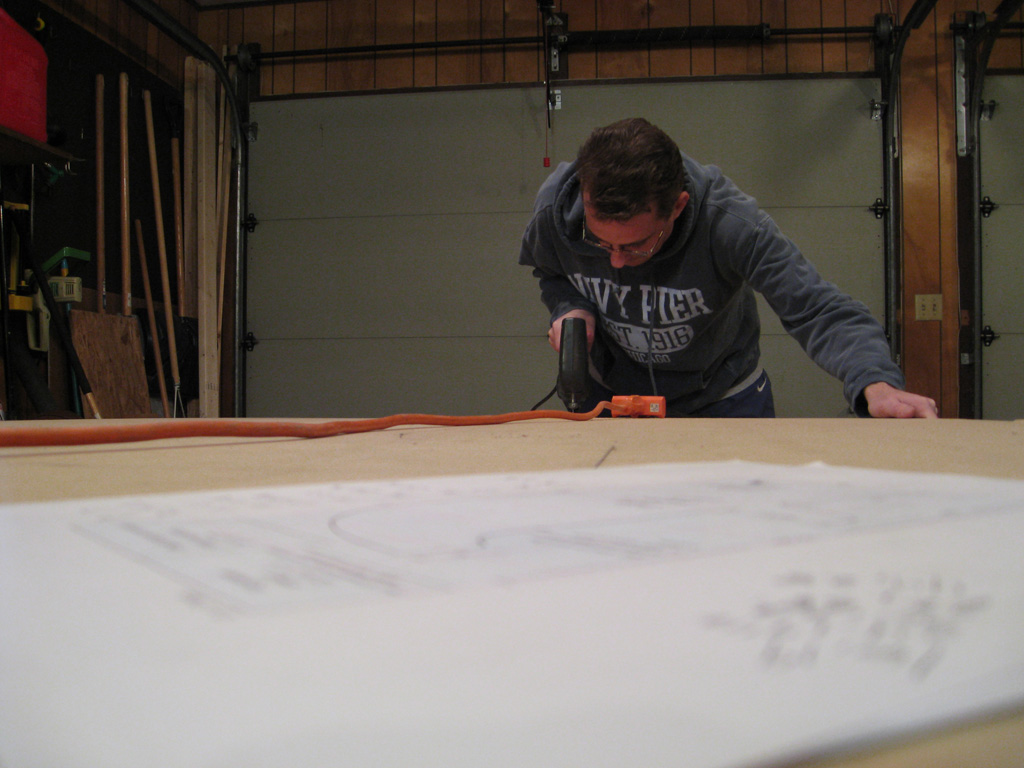
Ok, so today we started by sanding the first side that I cut on Day 1. I couldn’t get the rounded part on the first side drawn smoothly so I made straight cuts that I would later sand down. Getting the first side sanded and shaped exactly where I wanted it was key to getting both sides looking the same. My jig saw didn’t really cut very straight up and down either so it took a fair amount of sanding to fix it. Here we are using two sanders, one’s a belt sander for most of the shaping and then a circular sander for fine tuning.
The MDF material generates a ton of dust when you sand it so beware! You’ll be covered in the stuff by the time you are done. I kept using my leaf blower to blow a lot of the dust out of the garage and off of all the tools! After sanding the first side we laid that on top of a fresh 4×8 sheet of 3/4″ MDF and traced it, then cut it out. Once the second side is cut out we sanded it until the two matched as close as we could get them.
Like I said before having the right tools is key to getting this to look as nice as possible. I didn’t want to just throw some wood together and be done with it. My brother-in-law’s jig saw works 10 times better than mine so the second piece didn’t take near as much sanding.
And of course the ultimate tool…Mountain Dew!
Next we attached the base to the two sides and stuck a 2×4 between them at the top for support as we progressed. That upper support will come out later on.
Ok, next we attached supports on the top side and then put in the main top of the cabinet. Luckily my brother-in-law brought an electric nail gun which is an amazingly helpful tool! (I need to get me one of those!) We used the nail gun with glue to get the 2×4 supports in place and then we came back with some 2″ screws and screwed 2 of them on each side of the 2x4s for added strength. After that came the shelf across the front where the joystick panel will go.
We are getting excited, it’s really taking shape now!
One difficult part is making sure it’s level and even. My garage floor is not perfectly flat so it took extra measurements to make sure it turned out right.
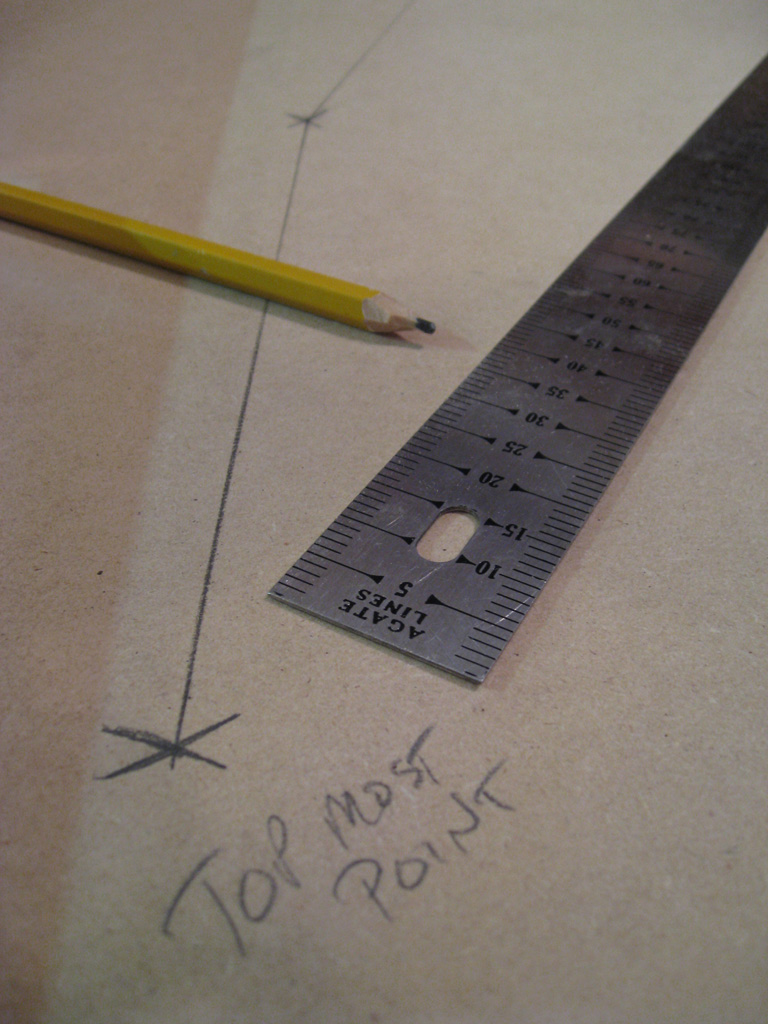
Day 1. So far I’ve build the base of the cabinet using 2x4s and I’ve drawn and cut one side of the cabinet.
The base of the whole thing
Taking some measurements and experimenting with heights.
Cutting the first side.
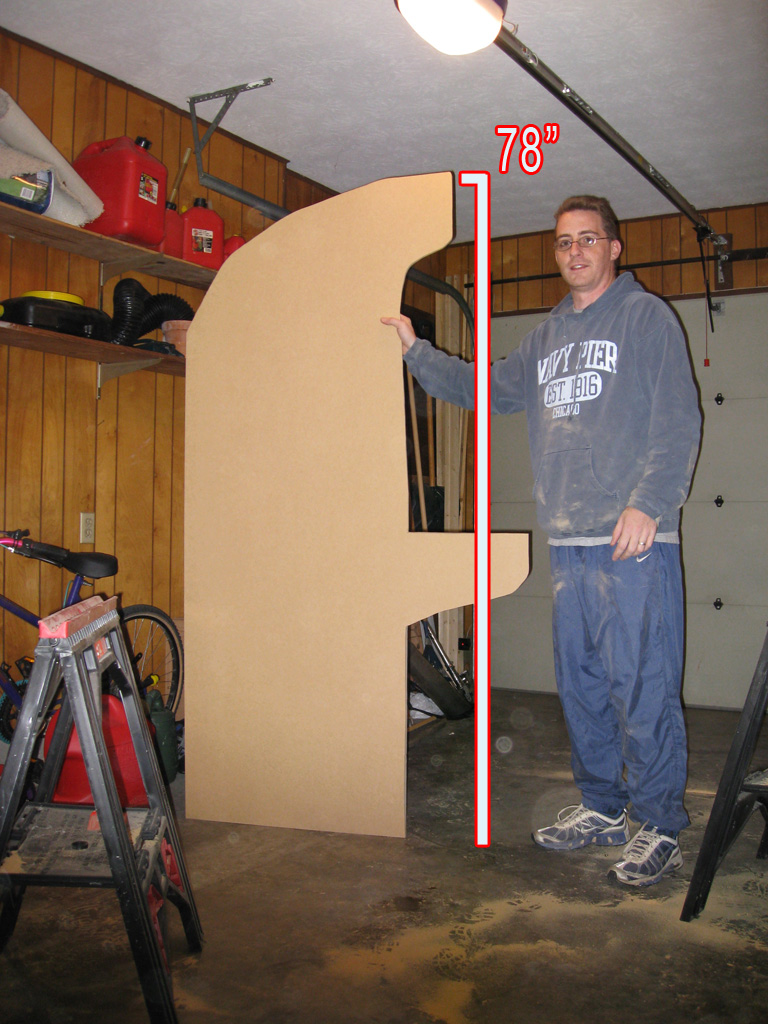
The first side done, I put the actual height so you get a better idea. Now it’s time to sand this one and shape it a bit more then trace it and do it again!
For those of you who have no clue what Mame is, it’s an emulator that uses software to recreate the old hardware that the old arcade cabinets like Pac-Man or Donkey Kong used to run those games. So, using a standard PC you can run the actual roms from games like Gauntlet or Space Invaders or Battle Zone or Frogger and such. Now, the emulator itself is freeware and can be found here. The roms are a different story. The roms are actually copyrighted software and cannot be distributed without the explicit permission of the copyright owner. That’s where I’m going to leave this discussion. I won’t answer questions about the games I run or don’t run or where I did or didn’t get them. That is information you can get and decide for yourself what you want to do with it. A simple Google search on the term Mame or roms will find you all you need.
There are emulators for anything you can think of and again I’m not going to discuss that part of the project. It’s for you to research and figure out for yourself. I will say that I am using a front end called Maximus Arcade to pull it all together. I tried some other front ends, but this one was my favorite. My second favorite was MameWah. Maximus Arcade supports all kinds of emulators and seemed to be the easiest to add and configure the emulators. It also supported ambient sounds and was just really cool looking! (Note: It’s not freeware, costs $25)
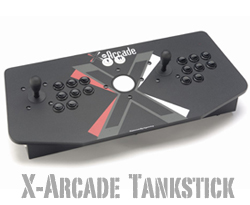
For the control panel (joysticks and buttons) I decided not to buy the joysticks and buttons and controllers needed and build it myself. I opted for X-Arcade’s Tankstick.
So as far as actually building the cabinet you really need several power tools to get it done. I’m always doing home improvement things, like remodeling bathrooms or building shelving and such, so I’ve already got pretty much all the tools I’ll need. The one tool I don’t have is a router, so it might be time to pick one up! (update: I ended up buying a router and the slot cutting router bit. Tip: make sure you put the slot cutting router bit together correctly, it makes a big difference. The router will be used to cut a groove along the edges of each side to put T-Molding into it and give it a more authentic arcade cabinet look.
I’m going to start a separate post for keeping track of the materials I use to make the cabinet, but I’ll briefly mention what I’ve used so far. I picked MDF for the main material for the cabinet, it’s smooth and very solid. It costs about $21 for a 4’x8′ sheet (Note: It’s very heavy, make sure you bring someone with you to pick it up!) I picked up 3 – 4′ x 8′ sheets. I’ll let you know later if I really need that much, but I got the 3rd sheet for half price since part of the edge was damaged and I knew I wouldn’t need it all. (You can probably get away with only 2 of them if you are very careful about your cuts.)
For the design of the cabinet I’m basing mine after one I found on Ugiansky.com. He’s got a great PDF (this link is a copy of the PDF on my site. I put it here in case his site disappears or is unavailable) with drawings . I’m changing his plans slightly, but will be using his for the most part. Most cabinet designs integrate the control panel while his has the control panel as more of a shelf. I liked this a lot because I will be able to easily remove the X-Arcade and plug in a steering wheel and such.
I can remember several places where I would play the old arcade games back in the 80’s. I remember going caming somewhere and they had a small arcade with Gradius. I remember a gas station somewhere near our house where I’d play Pac Man. I remember a bowling alley where I played Super Mario Brothers. I remember hours playing Contra and Donkey Kong and Star Wars and Castelvania and Gauntlet and Rampage and 1942 and Centipede and Kung Fu…I could keep going.
I’ve wanted to go back to those games and I’ve played them on the PC with a game pad and such, but that’s just not the same as standing in front of a cabinet with the joystick and big buttons. That’s why I’m building this cabinet. Maybe it’s because I’m getting older and going back to those days when I didn’t have kids and bills and responsibilities like I do now is attractive (not permanently mind you!). Maybe it’s my mid-life crisis, I don’t know. I guess it beats the other things I could be doing if it is, little red sports cars are expensive.
If you are like me and want to partially relive those times then building an arcade cabinet is for you! I warn you though, some people will look at you like your a complete moron. I ran into some people I know at Lowes and I had some of the materials for the cabinet and they asked what I was building. The conversation went something like…
Me: “Oh, I’m building an Arcade cabinet”
Them: “A what?”
Me: “An Arcade cabinet.”
Them: “Like, PacMan?”
Me: “Yeah, like PacMan”
Them: A blank confused stare on their face followed by, “Why would you do that?”
Many people will try and make you feel really stupid for doing it, but many conversations go like this:
Me: “Oh, I’m building an Arcade cabinet”
Them: “Oh, cool! Let me know when you’re done so I can come by and check it out! I’ve always wanted to do something like that! “
And I say, “yeah, so have I, and now I’m finally doing it.”
Update: 6/1/08 – So, it’s been about 6 months after starting to build the cabinet. It’s taken me way longer to build it than I thought it was going to. Much of that is due to a long cold and wet winter (I started it around the middle of December) and part is due to being super busy with family, work, church and getting my MCSE certification. The cabinet has come a long way and I’m super happy with how it’s turning out. It’s been one of those things that you look back on and think, “that was fun!” If you are contemplating building your own, I highly encourage you do jump in!
In this post I’ll try and keep a running list of materials used for the cabinet.
Tools
Jig Saw (get a set of new blades so they are good and sharp!)
Drill with a drill bit that has a built in countersink
Get a screw bit as well I have one of those quick change type that works well.
Table Saw
Liquid nail or wood glue
Sander
Nail gun (not necessary, but man it sure is nice!)
Hole cutting drill bit
I first used the hole saw type like this:
But it didn’t work very well, the teeth get gummed up with the MDF.
And then it starts to burn and stink!
Then I switched to this type:
This one worked much better. It cut right through the MDF much easier.
Shop Vac (to pick up all the dust!
Router and a 1/16″ Slot Cutting bit
Building Materials
Box of 2″ Drywall course screws
3 – Sheets 4′ x 8′ x 3/4″ MDF
3 – 10′ 2x4s (probably only need 2 but they are only $3 each and I didn’t want to make another trip)
I used several 2 foot pieces for support, probably overkill but oh well.
3 – 8′ 1x2s (I already had several of these lying around) They are great for adding support under shelves etc.
2 – swivelling/locking caster wheels
(update: I’m not sure about these wheels, they might be too small.)
(these go on the front of the base, about $1.99 ea)
2 – non-swivelling caster wheels (on the back of the base, about $1.99 ea)
Drawer slides: I used these cheaper sets, they are about $7 from Lowes or Home Depot.
They come in different lengths I used 18″
Gray primer paint
Black paint (not sure yet which type of finish to use I used a semi-gloss finish and it turned out nice.)
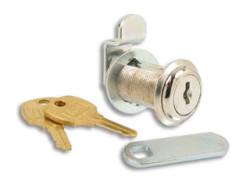
Cam Lock (see Day 6 for explanation, about $6 Home Depot)
Cabinet door magnetic catch I didn’t end up using this. (see Day 6 for explanation)
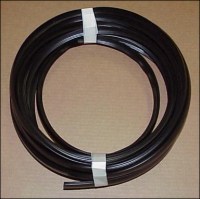
T-Molding – 20 feet (about $.47 a foot)
I wasn’t going to do the T-Molding at first, but I’m glad I did. It really adds to the arcade feel .
20″ fluorescent light (for the marquee, about $15 from Home Depot)
2 – 36″ Aluminum L shaped brackets, see day 7 for details.
(only needed 24″ but they didn’t come in that size, $2.99 ea)
24″ x 18″ sheet of plexiglass see day 7 for details. (for the marquee, $7.00 from Home Depot)
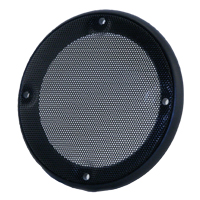
2 – Speaker grilles
Purchased from Happ Controls $4.50 ea
Computer Equipment
TV – 25″ or 27″ depends on how big you want your cabinet. (I used a 25″ JVC and it was 3/4″ too wide. See day 10 for details.)
PC – For the old arcade roms you don’t need a beefy computer at all.
You’ll need a s-video out capable video card if you plan on using a TV.
Unless you want to use a VGA converter.
If you want to do some of the new emulators for other consoles you’ll need a bit better computer.
Joystick Controller
I’m using X-Arcade’s Dual Tankstick. ($199.00)
You can build the controller with the joysticks and buttons yourself, but I didn’t want to.
Maybe if I do this again I’ll go that route.
Speakers – I recommend getting a decent set of speakers with a subwoofer.
When you hit the coin button on PacMan and it’s got some good bass and turned up it’s like I’m 12 or 13 again.
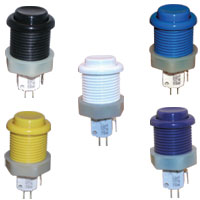
2 – Push buttons for computer power switch and reset switch. $2.00 ea
I bought them from Happ Control. I actually bought about 6 of them in case I needed more for something else.