So, I finally got started on my Mame Arcade Cabinet.

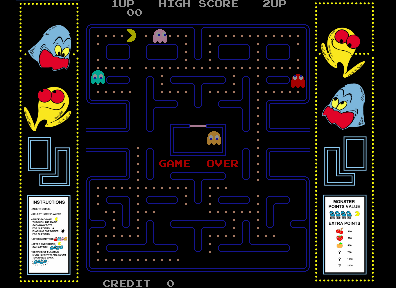
Click here to get your PacMan fix.
For those of you who have no clue what Mame is, it’s an emulator that uses software to recreate the old hardware that the old arcade cabinets like Pac-Man or Donkey Kong used to run those games. So, using a standard PC you can run the actual roms from games like Gauntlet or Space Invaders or Battle Zone or Frogger and such. Now, the emulator itself is freeware and can be found here. The roms are a different story. The roms are actually copyrighted software and cannot be distributed without the explicit permission of the copyright owner. That’s where I’m going to leave this discussion. I won’t answer questions about the games I run or don’t run or where I did or didn’t get them. That is information you can get and decide for yourself what you want to do with it. A simple Google search on the term Mame or roms will find you all you need.
There are emulators for anything you can think of and again I’m not going to discuss that part of the project. It’s for you to research and figure out for yourself. I will say that I am using a front end called Maximus Arcade to pull it all together. I tried some other front ends, but this one was my favorite. My second favorite was MameWah. Maximus Arcade supports all kinds of emulators and seemed to be the easiest to add and configure the emulators. It also supported ambient sounds and was just really cool looking! (Note: It’s not freeware, costs $25)
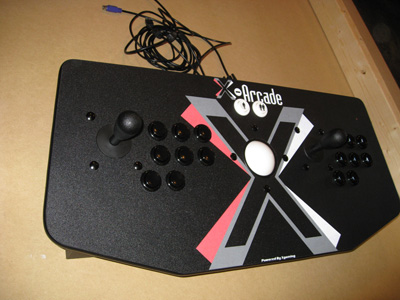
For the control panel (joysticks and buttons) I decided not to buy the joysticks and buttons and controllers needed and build it myself. I opted for X-Arcade’s Tankstick.

So as far as actually building the cabinet you really need several power tools to get it done. I’m always doing home improvement things, like remodeling bathrooms or building shelving and such, so I’ve already got pretty much all the tools I’ll need. The one tool I don’t have is a router, so it might be time to pick one up! (update: I ended up buying a router and the slot cutting router bit. Tip: make sure you put the slot cutting router bit together correctly, it makes a big difference. The router will be used to cut a groove along the edges of each side to put T-Molding into it and give it a more authentic arcade cabinet look.
I’m going to start a separate post for keeping track of the materials I use to make the cabinet, but I’ll briefly mention what I’ve used so far. I picked MDF for the main material for the cabinet, it’s smooth and very solid. It costs about $21 for a 4’x8′ sheet (Note: It’s very heavy, make sure you bring someone with you to pick it up!) I picked up 3 – 4′ x 8′ sheets. I’ll let you know later if I really need that much, but I got the 3rd sheet for half price since part of the edge was damaged and I knew I wouldn’t need it all. (You can probably get away with only 2 of them if you are very careful about your cuts.)
For the design of the cabinet I’m basing mine after one I found on Ugiansky.com. He’s got a great PDF (this link is a copy of the PDF on my site. I put it here in case his site disappears or is unavailable) with drawings . I’m changing his plans slightly, but will be using his for the most part. Most cabinet designs integrate the control panel while his has the control panel as more of a shelf. I liked this a lot because I will be able to easily remove the X-Arcade and plug in a steering wheel and such.
I can remember several places where I would play the old arcade games back in the 80’s. I remember going caming somewhere and they had a small arcade with Gradius. I remember a gas station somewhere near our house where I’d play Pac Man. I remember a bowling alley where I played Super Mario Brothers. I remember hours playing Contra and Donkey Kong and Star Wars and Castelvania and Gauntlet and Rampage and 1942 and Centipede and Kung Fu…I could keep going.
I’ve wanted to go back to those games and I’ve played them on the PC with a game pad and such, but that’s just not the same as standing in front of a cabinet with the joystick and big buttons. That’s why I’m building this cabinet. Maybe it’s because I’m getting older and going back to those days when I didn’t have kids and bills and responsibilities like I do now is attractive (not permanently mind you!). Maybe it’s my mid-life crisis, I don’t know. I guess it beats the other things I could be doing if it is, little red sports cars are expensive.
If you are like me and want to partially relive those times then building an arcade cabinet is for you! I warn you though, some people will look at you like your a complete moron. I ran into some people I know at Lowes and I had some of the materials for the cabinet and they asked what I was building. The conversation went something like…
Me: “Oh, I’m building an Arcade cabinet”
Them: “A what?”
Me: “An Arcade cabinet.”
Them: “Like, PacMan?”
Me: “Yeah, like PacMan”
Them: A blank confused stare on their face followed by, “Why would you do that?”
Many people will try and make you feel really stupid for doing it, but many conversations go like this:
Me: “Oh, I’m building an Arcade cabinet”
Them: “Oh, cool! Let me know when you’re done so I can come by and check it out! I’ve always wanted to do something like that! “
And I say, “yeah, so have I, and now I’m finally doing it.”
Update: 6/1/08 – So, it’s been about 6 months after starting to build the cabinet. It’s taken me way longer to build it than I thought it was going to. Much of that is due to a long cold and wet winter (I started it around the middle of December) and part is due to being super busy with family, work, church and getting my MCSE certification. The cabinet has come a long way and I’m super happy with how it’s turning out. It’s been one of those things that you look back on and think, “that was fun!” If you are contemplating building your own, I highly encourage you do jump in!
