Adobe Lightroom Keyboard Shortcuts
Reset Devop settings: CRTL-Alt-R
Edit in Photoshop: CTRL-E
Copy/Paste Develop Settings: CTRL-SHIFT-C/CRTL-SHIFT-V
Reset Devop settings: CRTL-Alt-R
Edit in Photoshop: CTRL-E
Copy/Paste Develop Settings: CTRL-SHIFT-C/CRTL-SHIFT-V
If you are like me and enjoy the filters that Instagram uses in it’s iOS and Android apps but would like to create the look in Photoshop you are in luck! Daniel Box has created a set of Photoshop actions that mimic the filters found in Instagram.
I know there are lots of people who absolutely hate these types of effects, but I rather enjoy them. :)
They can be found here on his blog.
This sample is the “Brannan” action.
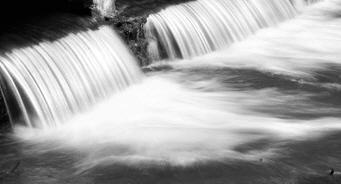
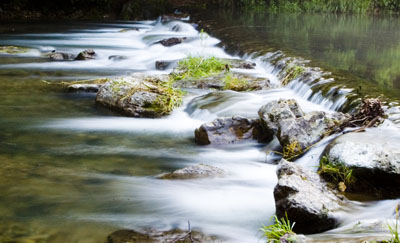
I’ve always liked shots that have the water looking like silk, especially waterfalls. Early on I figured out I could get this effect by doing a long exposure, but it had to be done in lower light. This usually meant hanging around the water area at sunset. Otherwise there’s just too much light and it all gets blown out.
Then I purchased a Polarizer filter because I read somewhere that it would do something cool, I don’t remember what or why but I did. The polorizer is a handy filter that really makes the sky pop and cuts down on reflected glare. Anyways I found that I didn’t have to have as dark a setting to get the cool water effect.
Then I read about the Neutral Density filter which worked even better. The Neutral Density filter basically allows you to slow the shutter speed down even more.
So, today I was out shooting and was around a waterfall, but it was noon and the sun was at it’s high point making it hard to get that cool silky effect. So I stacked the Polarizer and the Neutral Density filter on top of each other and was able to shoot at a slow shutter speed without blowing alot of the water out!
This coming Sunday I am headed to Las Vegas for a week. Brandon and I are going to be attending a Windows and Microsoft Exchange conference held there. The conferences are the main reason for us going there, but my next reason (and the part I’m looking more forward to…) is to get some good shots. We are planning on hitting the city hard and then heading to the Grand Canyon as well.
If there are anymore of you geeky photobloggers out there like us who will be attending the conferences let us know so we can hook up! I’m super excited and ready to get to shooting. If you visit my photoblog you’ll probably notice that I haven’t been posting much lately and that’s because I haven’t been shooting much lately. I haven’t picked up my camera nor done much post-processing much at all for about a month or more. I just needed a break from it and have had a bunch of other things come up. One major project is we are re-modeling our bathroom, so that’s consumed every free minute for the past week and I’m barely half way there!
At this stage in the project I’ve removed the old yellow tile that was around the bathtub and along the wall by the toilet. I’ve removed the sheet rock that was behind the tile and started to hang the hardibacker where I’ll be putting tile back up. Tommorrow I’ll be removing the tub, replacing the fixtures and finishing putting up the hardibacker. I’ll try to remember to post some after pictures when we are done. I wish I had took some shots before we started, but oh well.
Anyways, since we are headed to Vegas and will be wondering around the landscape outside it and by the Grand Canyon I thought I really wanted to use a wider angle lens so I’ve got one of the 10-20mm F4-5.6 EX DC Sigma lens. I’ve played around with it a little and am liking it so far. Check back next week and see if I manage to get any good shots with it!
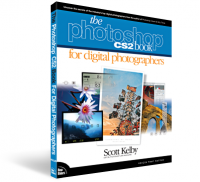
I’ve been reading a great book called “The Photoshop CS2 Book for Digital Photographers” and I’ve picked up a number of useful tips and tricks. One great one that I thought I’d share is how to add more canvas area using the crop tool. The author of the book Scott Kelby goes on to explain how to do this. When you have the image open that you want to add canvas area to hit the F key to reveal the grey desktop area around your image. Hit D to set your background color to the default of white. Click on the crop tool and create a crop selection within the image. The size and shape of it does not matter much at this point. Once you have your crop selection area you can then resize the selection outside of the borders of your image to include the area you want to add. Hit enter and the new white canvas area will be added to your image. Pretty cool huh? Thanks to Scott Kelby for his excellent book. There are many many more tips and tricks in his book. Even after using Photoshop for several years I’ve learned numerous new things to help with post processing.
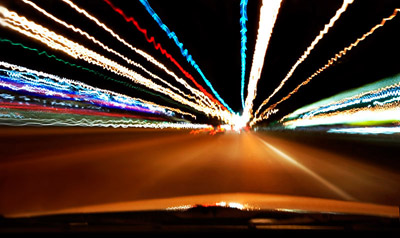
I have always liked the shots from inside a car taken at night. I’ve tried them in the past and just hadn’t been that impressed with the results. I was reading a photography magazine and they had a feature about these types of shots. The writer of the article explained that he took his tripod and set it up in the front area of his car and used that to get his shots. So, I put up my tripod and wedged one leg between the driver and passenger seat, stuck my camera on it and grabbed my remote. Using the remote in combination with the tripod makes it much easier and safer to shoot periodically while driving. I turned off the autofocus and set my focus ring on infinity. The sample below is a 30 second exposure at F13. You can play with different exposure lengths and settings to get the ideal shot. I wish I had a wider angle lens so I could get more in the shot. This shot was done with my lens at 24mm. It seemed to me that the better shots where those where the road stayed straight during the exposure and when I would pass under one or two stop lights.
 Need an idea for some new shots? Check out camera tossing. I’m not sure you want to do this with your Nikon D70 or Canon 20D. But if you have an older camera laying around that you wouldn’t cry if it happens to hit the ground instead of your hands after being tossed, then you could have something new to try.
I know I’m going to try it with my Canon SD300. I’ll post some shots from it later, as long as I don’t break the thing first!
Update: These are some samples I did using my Canon SD300. It’s not near as cool as some of the samples from the camera tossing blog, but it’s my first attempt! You can click the small versions and see a larger version. They work pretty well as a wallpaper!
Check out these samples on Flickr as well.
The next time you are at Walmart or some other discount store pick up a cheap spray bottle.
You can get at least two great uses out of one of these.
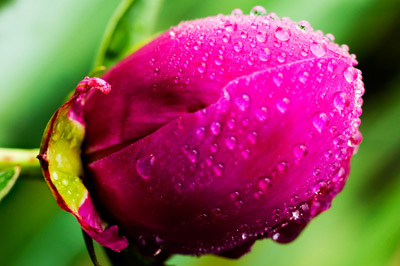
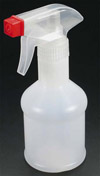 1. When you are out shooting flowers spruce up those shots with some simulated rain drops. It can make an ordinary flower shot a bit more interesting. If you are like me and don’t want to get up early in the morning to catch the morning dew then this $2.00 investment will be a great asset to your photography equipment.
2. The next time you are barbequeing use the spray bottle to keep your chicken from getting too dry. Spraying the chicken down with water periodically will help the chicken come off the grill nice and juicy.
When going out to shoot water by a river or lake make sure you bring along some bug spray. The makers of Off! have some handy wipes that you can easily fit in your camera bag and take along with you. This is especially important if you are going to be shooting by the water around sunset, because the mosquito’s and other little impolite creatures will work you over! On a camping trip this past weekend I spent some time as the sun was setting getting long exposures by a river. I had thankfully sprayed myself with Off! and still managed to get a couple of decent bites. Although I managed to keep the bugs away for the most part I didn’t get as many decent shots as I had hoped for.
Update: 06/21/2006 I didn’t take my own advice and went out shooting in some tall grass. I now have a bite from a spider or tick on the back of my leg that is a large dark color now. I ended up going to the doctor and getting some prescriptions (anti-biotic and one with cortisone). It’s much easier to give advice than to take advice, especially taking your own advice.
I’ve been posting images to my photoblog for over a year now, I’ve so far managed to have a new shot every day for 479 straight days. Now, I’m not bragging and saying look at what a great guy I am because I would consider only a handful of them all that great. But, my point is I’ve been doing this for awhile now and I learned something today that I wish I knew 479 images ago.
I’m guessing that most of you probably already know what I learned today and are probably going to say, duh! But there may be some of you for whom, like me, bright lights and singing from heaven was heard when I came across it.
Before I get to the great revelation, let me start with some background. I’ve long known that my images just don’t look the same in Photoshop as they do on the web. The pop and the color just don’t match what I see when I work on shots and when I post them. I just figured it was some color calibration thing of my monitor or something I was doing wrong or something that only the truly gifted and wise like David from Chromasia knew.
I searched Google and kept running into monitor calibration tutorials and other such advice that never worked. I even played a bit with color profiles in Photoshop, but that didn’t seem to help either.
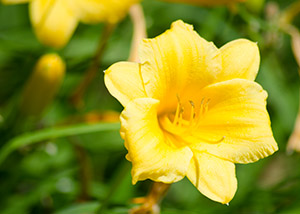
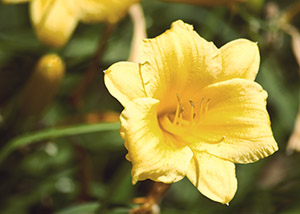
Then I watched a video tutorial on Radiant Vista and found the magic ingredient I needed. The video is called “Sizing images for the web.” And they walk you through the steps that you should take when saving images for viewing on the web. One of the steps is to convert your image’s color profile from Adobe RGB to sRGB by going to edit/convert to profile. I had done this but never saw a difference in the image from within Photoshop, so went back to Adobe RGB and figured I was cursed with this problem forever. Why did i never convert the color profile and upload the picture I’ll never know. I’m a computer guy and I do programming and network administration and computer trouble shooting so my mind is generally programmed to work through problems by process of elimination but the process broke down here for some reason. Consider these two pictures: (the difference is harder to notice at this small size. Check out this page for larger versions.)
The difference between the two seems small, but to me who worked with the image to get it where I wanted, it’s huge. This difference has been a thorn in my side for some time, sitting there nagging me and irritating me.
Hopefully this helps someone like myself who’s fought with this issue for sometime. If I had money I would give generous amounts of it to the Radiant Vista crew or if I didn’t already have children I’d offer my first-born or something. Maybe some day when I get rich and famous I’ll look them up!
Update: I found a place to make donations on Radiant Vista’s website and made a small donation. I encourage you to make a donation also since their content is so valuable and useful. Every little bit helps with the costs of bandwidth and such.
Out of curiosity, how many of you already knew this?