In this post I’ll try and keep a running list of materials used for the cabinet.
Tools
- Jig Saw (get a set of new blades so they are good and sharp!)
- Drill with a drill bit that has a built in countersink
- Get a screw bit as well I have one of those quick change type that works well.
- Table Saw
- Liquid nail or wood glue
- Sander
- Nail gun (not necessary, but man it sure is nice!)
- Hole cutting drill bit
I first used the hole saw type like this:
But it didn’t work very well, the teeth get gummed up with the MDF.
And then it starts to burn and stink!
Then I switched to this type:
This one worked much better. It cut right through the MDF much easier.- Shop Vac (to pick up all the dust!
- Router and a 1/16″ Slot Cutting bit


Building Materials
- Box of 2″ Drywall course screws
- 3 – Sheets 4′ x 8′ x 3/4″ MDF
- 3 – 10′ 2x4s (probably only need 2 but they are only $3 each and I didn’t want to make another trip)
I used several 2 foot pieces for support, probably overkill but oh well.- 3 – 8′ 1x2s (I already had several of these lying around) They are great for adding support under shelves etc.
- 2 – swivelling/locking caster wheels
(update: I’m not sure about these wheels, they might be too small.)
(these go on the front of the base, about $1.99 ea)
2 – non-swivelling caster wheels (on the back of the base, about $1.99 ea)
- Drawer slides: I used these cheaper sets, they are about $7 from Lowes or Home Depot.
They come in different lengths I used 18″
- Gray primer paint
- Black paint (not sure yet which type of finish to use I used a semi-gloss finish and it turned out nice.)
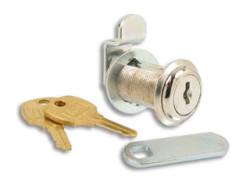
- Cam Lock (see Day 6 for explanation, about $6 Home Depot)
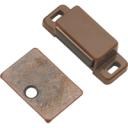
- Cabinet door magnetic catch I didn’t end up using this. (see Day 6 for explanation)
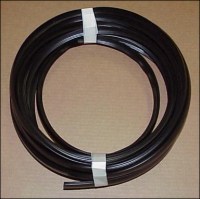
- T-Molding – 20 feet (about $.47 a foot)
I wasn’t going to do the T-Molding at first, but I’m glad I did. It really adds to the arcade feel .- 20″ fluorescent light (for the marquee, about $15 from Home Depot)
- 2 – 36″ Aluminum L shaped brackets, see day 7 for details.
(only needed 24″ but they didn’t come in that size, $2.99 ea)- 24″ x 18″ sheet of plexiglass see day 7 for details. (for the marquee, $7.00 from Home Depot)
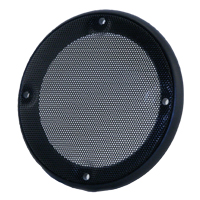
- 2 – Speaker grilles
Purchased from Happ Controls $4.50 ea


Computer Equipment
- TV – 25″ or 27″ depends on how big you want your cabinet. (I used a 25″ JVC and it was 3/4″ too wide. See day 10 for details.)
- PC – For the old arcade roms you don’t need a beefy computer at all.
You’ll need a s-video out capable video card if you plan on using a TV.
Unless you want to use a VGA converter.
If you want to do some of the new emulators for other consoles you’ll need a bit better computer.- Joystick Controller
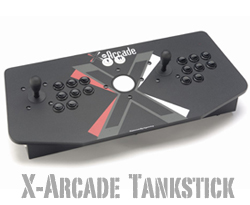
I’m using X-Arcade’s Dual Tankstick. ($199.00)
You can build the controller with the joysticks and buttons yourself, but I didn’t want to.
Maybe if I do this again I’ll go that route.- Speakers – I recommend getting a decent set of speakers with a subwoofer.
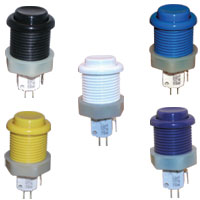
When you hit the coin button on PacMan and it’s got some good bass and turned up it’s like I’m 12 or 13 again.- 2 – Push buttons for computer power switch and reset switch. $2.00 ea
I bought them from Happ Control. I actually bought about 6 of them in case I needed more for something else.
Next :: Goto Mame Arcade Cabinet – Online Resources