by Jason Prahl | Aug 2, 2008 | Blog, Linux Tips and Tricks

Don’t laugh…I’m trying to learn Linux and I just needed a place to store miscellaneous commands, my memory is short and I forget how to do things.
- ifconfig eth0 (kinda like ipconfig for Windows but does more stuff)
- fup eth0 (turns on an interface adapter) ifdown does the opposite.
- hidd –server –search (Attach bluetooth mouse, make sure you hit the reset button on the mouse so it’s in discover mode. Found solution here.)
- yum install libflashsupport (Install flash support library. Fixed my issue with no audio from flash files in Firefox. Found solution here.)
by Jason Prahl | Jul 13, 2008 | Blog, Computer Tips, Microsoft Windows


I have an unattended installation of Windows XP that I slip-streamed Service Pack 3 into.
On an EVGA motherboard I was recently loading with Windows I could get everything working except the audio.
In the device manager I had 1 unkown pci device item listed. Had to be the audio right?
Well I used the cd that came with the motheboard, no luck.
I went to Realtek’s support page and downloaded the latest driver, still no luck.
No matter what I did the PCI device would not update to the audio.
Finally on some sort of flash I googled “XP SP3 HD Audio“.
One of the results returned this page which talked about the exact problem and had a download to fix it.
I’m making the download available from here in case their site goes away.
I do not vouch for the file, all I can tell you is it fixed my problem. Download from here or there at your own risk.
So, apparently the PCI device isn’t actually the audio card itself, but a UAA bus driver for high definition audio.
I found on Microsoft’s site, mention of this, and had downloads for SP1 and SP2. Their site said it wasn’t needed for SP3.
Wrong! Once I pointed the PCI device at the update and it installed itself, the Realtek HD Audio device was detected and it proceeded to install the drivers I had installed earlier.
Strange and irritating, but I’ve got audio now!
by Jason Prahl | Jun 25, 2008 | Blog, SQL Server

Have you ever wanted to have a row count as a column in sql output?
Well, I have for a number of different reasons and this is how I found to do it.
ROW_NUMBER() OVER(Order by ‘SomeColumn’) as seq
by Jason Prahl | Jun 21, 2008 | Blog, Computer Tips

Earlier today my Blackberry Curve quit receiving any data services at all. The internet didn’t work, email didn’t work, nothing worked related to data. I thought at first maybe it was a Blackberry outage of some sort. After a couple of hours I figured it must be something else.
So, I did the first thing any good troubleshooter should do…reboot. I removed the battery and reset the phone. No luck, I can place phone calls, but no data services.
Ok, maybe some application is messed up and causing the problem. I go to the Blackberry options and under the security settings I wiped the phone, first without erasing third party applications and the second time I erased everything. No luck. Still no data services. I can’t activate the Blackberry on our enterprise server and nothing works except for making phone calls. I get an error message “service connection is unavailable” when trying to activate on the enterprise server.
I finally resorted to calling Alltel.
The girl on the phone says hit the green button.
I did it.
Do you see something that says line 2?
Yes I do, it says Line 2: 417 xxx xxxx (my phone number).
She says ok, scroll up and click where it says Line 2.
I do and then a list appears that says Line 1 and below it Line 2.
Select Line 1 she says.
As soon as I select Line 1 the up and down arrows start flashing and an email pops in. Sheesh. That’s all I needed to do?
The little 1XEV also popped up in the upper right of the screen by the bars indicating signal strength.
Kinda wierd, but at least now I know if it happens again!
by Jason Prahl | Jun 1, 2008 | Blog, Mame Arcade Cabinet
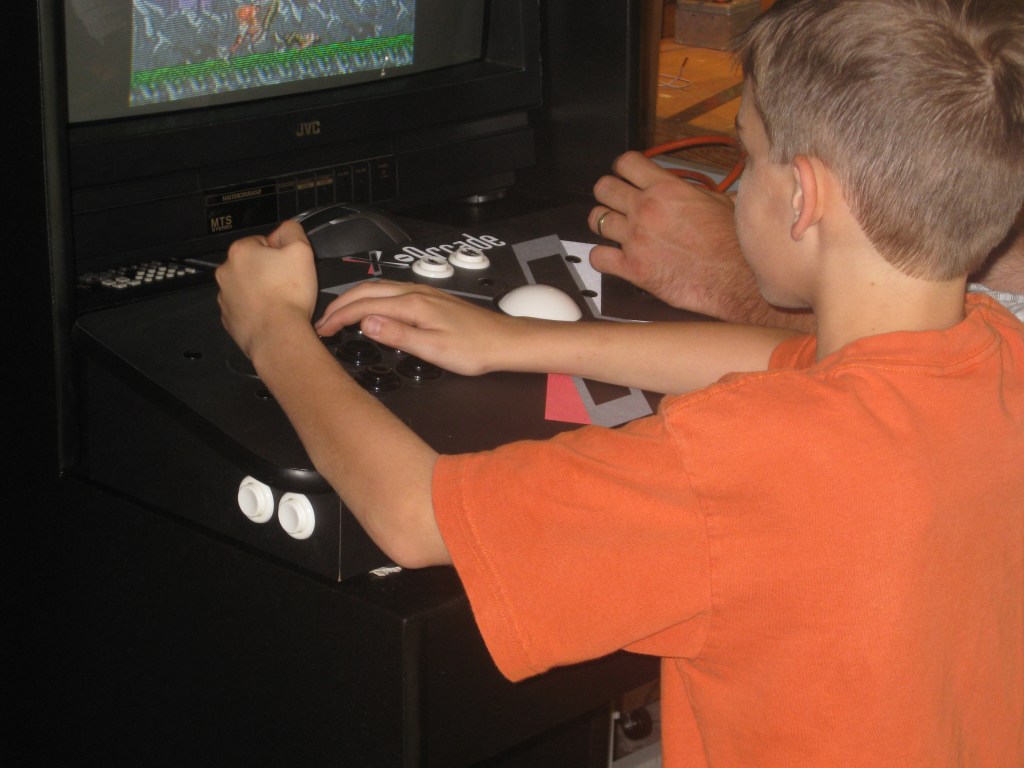
I managed to get the rest of the parts painted black, including the speaker panel.
Here is my son and brother-in-law playing Contra. Great game!
(Note: click the images for larger versions.)
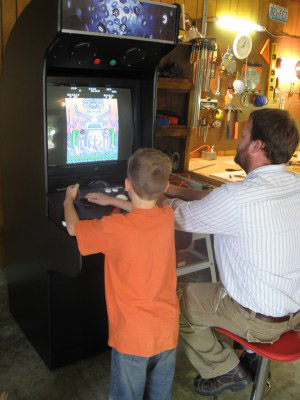

You can’t really see them in this size, but if you click on the image below you will be able to see the LED lights just below the green and red buttons.
Stuff I still need to do:
Get the marquee printed at Kinko’s.
Get glass to server as bezel in front of the TV.
Design artwork for side of cabinet, front of drawer and glass bezel.
Install piece of trim across the front above the drawer.
Get glass to server as bezel in front of the TV.
Get a switch box so I can install an XBox 360 and PS2 and switch between them.
Make an opening on the front door to give easy access to consoles etc. inside.
Whatever else pops into my head! :)
by Jason Prahl | May 30, 2008 | Blog, Computer Tips, Microsoft Windows

Service Pack 3 for Windows XP included an update to the remote desktop client which appears to have broken the old command for connecting to the console session of another computer. For some of my users I will setup their remote desktop settings and save those to a rdp file that can then be used to jump into a remote desktop session. The rdp file that the remote desktop creates is just a text file with settings in it. You used to be able to edit the text file and add a line that read:
connect to console:i:1
This would cause the session to connect to the console instead of a standard terminal services session allowing the user to interact with the same session as if you were sitting in front of the computer. For some reason this week these rdp sessions quit connecting to the console session on my servers.
After some investigation I found that this setting no longer works and you have to use:
administrative session:i:1.
Just a minor change but with large consequences!
Related to this is the fact that running mstsc.exe /console no longer works.
I’ve read that mstsc.exe /admin achieves the same thing, but I haven’t tested it yet. The reason for this change is that running remote desktop and connecting to the console connects you to session 0 which runs with elevated privileges and therefore is a security risk.
by Jason Prahl | May 13, 2008 | Blog, Mame Arcade Cabinet
More progress! You might be wondering where Day 9 is, well, day 9 took place a couple of weeks ago and I never got around to posting it! I’ll put it up later this week. (Day 9 posted 6/1/08)
When last we left the continuing saga of the Mame Arcade Cabinet back on the update following Day 8 the cabinet had been painted primer grey and the T-Molding still wasn’t done.
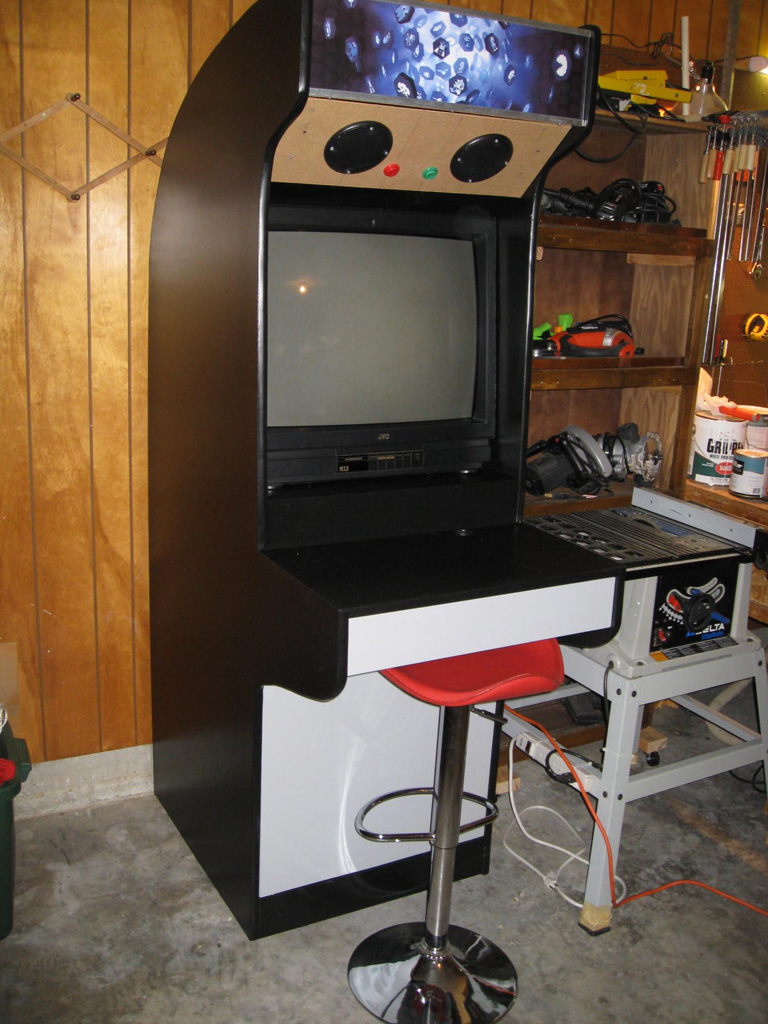
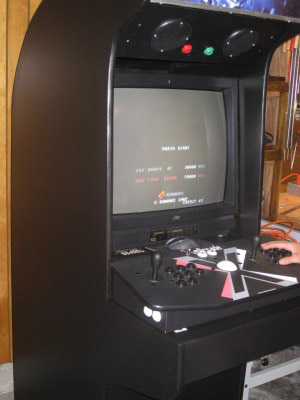
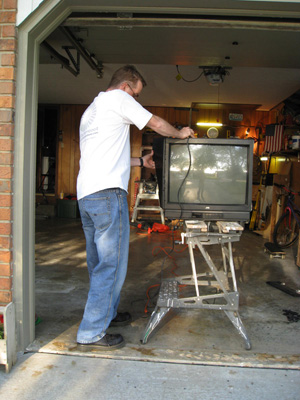
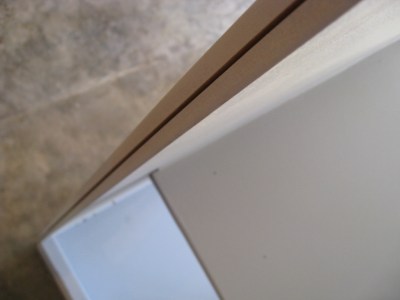
We join the saga on Day 10 and it’s been painted black (most of it), the T-Molding has been installed and I found a TV! It was my first Craig’s List purchase! I had been watching Craig’s list for 25″ TV’s for several weeks and hadn’t really found anything promising. Then I saw this posting on there for a JVC 25″ TV with a good picture, broken remote and for the low low price of $20. So, I contacted the guy and he said he’d let it go for $15 because he was eager to get it out of his house.
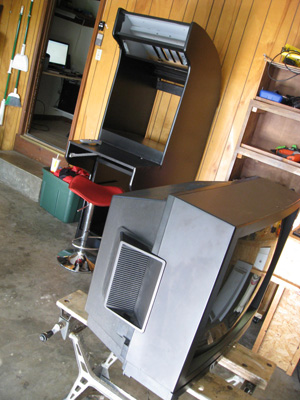
So, I get the TV home and it works great but…it’s 3/4 of an inch to wide to fit in the cabinet! Just 3/4 of an inch!
My first thought was…where’s my Dremel?
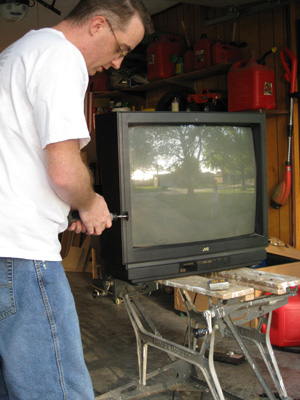
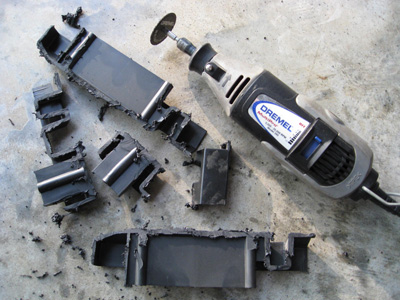
So after a bit of hacking the TV fit into the cabinet nicely. Next I plugged my Satellite TV into it to make sure the thing still worked and it does!
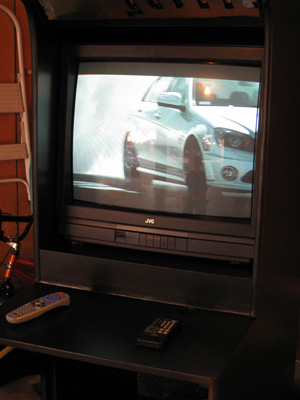
So here it is as it stands. I still need to paint the speaker panel, the front main door, the shelves and a little touch ups here and there. Then I need to get the computer hooked back up with the joystick. Next comes getting a piece of glass that will serve as the bezel in front of the TV as well as some sort of artwork for the sides of the cabinet. Oh, and I need to get the artwork at the top printed by Kinko’s or someone. Currently I just printed it on two sheets of paper on my inkjet printer and put them together, but when the light is on you can see the seams. It’s looking more and more like an arcade cabinet!

Day 10 hours: 2
Next :: Goto Mame Arcade Cabinet – Day 11
by Jason Prahl | Apr 5, 2008 | Blog, Mame Arcade Cabinet
Day 9 brings in routing the edges for T-Molding, black paint and wiring switches and lights on the speaker panel.
After my first encounter with the router and doing the T-Molding I was really not looking forward to this part. But, once I got the depth set correctly and went after it, it worked like a charm. I do recommend doing this part before assembly of the cabinet, but since I had only done the primer coats it turned out great. I zipped around the edges and had a good clean groove in no time.
I’m not sure what it is about painting that I don’t like, but I really hate painting. Maybe it’s the monotonous motion of rolling or brushing on the paint, I don’t know. So, I started in on the black paint.
I got bored with painting so I turned my attention to wiring the switches and LED lights on the speaker panel.
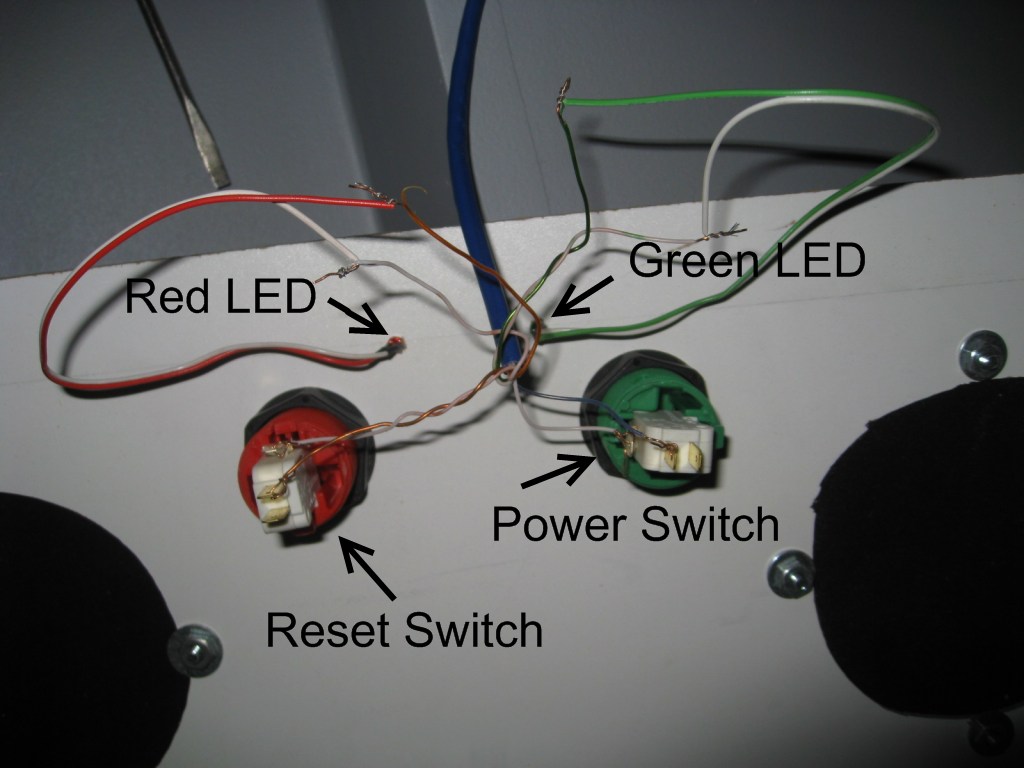
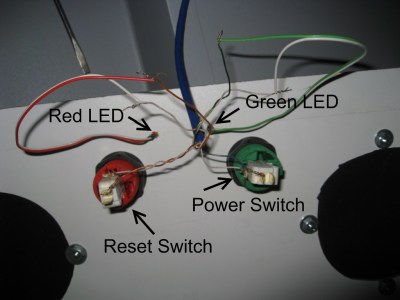
I wanted to be able to turn the computer on and off without having to open the front door of the cabinet. So, I took an old computer case and removed the green LED, red LED and the connections running from the power switch and reset switch. The I grabbed a long piece of cat5 cable and connected the motherboard connectors to the ends of each pair of the cat5.
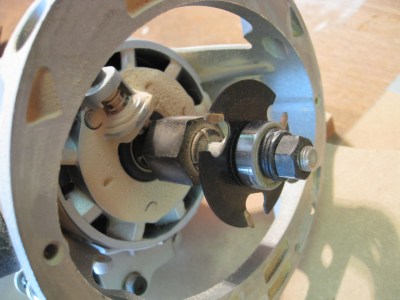
I forgot to get a shot of the wires as they connect to the motherboard on the computer I’m using for the arcade, I’ll add that later. I ran the cable up to where the speaker panel is and connected the wires to the corresponding color pairs that I used at the motherboard end. The LEDs are mounted on the speaker panel by just drilling a small hole and pushing the LEDs into the hole. I’ll get a better shot of the front of the speaker panel later so you can see what I’m talking about.
What you see here is the back of the speaker panel.
One thing I found with the speaker grill is that since my speakers aren’t mounted right up against the speaker panel I was able to see through the speaker grill into the upper area of the cabinet. I took care of this by cutting circles out of a black t-shirt that were slightly smaller than the diameter of the speaker grill.  This let’s the sound through and you can’t see anything behind the speaker grill now!
I still have the drawer, front door and a bunch of touch up painting to do yet.
Day 9 hours: 4 1/2
Next :: Goto Mame Arcade Cabinet – Day 10
by Jason Prahl | Mar 23, 2008 | Blog, Microsoft Windows

While studying for the MCSE 70-294 test on active directory I ran across this little command that I was previously not aware of. redircmp.exe
So, you can type: redircmp ou=mycomputers,DC=corp,dc=com
Replace the mycomputers with the ou (organizational unit) that you want all new computer accounts to go to. Replace the corp with your domain name and the com with
Pretty cool! I made a new OU where I store my computer accounts in and I always forget that new computer accounts go to the computers ou and it generally takes me a minute or two before I remember. This way new computer accounts will automatically go to the ou of my choice.
Go here to Microsoft’s website for more info on these commands.
You can also use: redirusr ou=myusers,DC=corp,dc=com
This will redirect the location that new user accounts are made in. I don’t use this one, but it is good to know.
by Jason Prahl | Mar 18, 2008 | Blog, Computer Tips, Microsoft Windows

I was working on one of my computers at home and decided to load Windows Vista on it. I grabbed a copy of Windows Vista Ultimate and thought I’d throw that on it. So, I put in the DVD, boot it up, pick my language, enter the product key and I get the following message: “Windows cannot be installed to this HD space. The partition contains one or more dynamic volumes that are not supported for installation”
Ok, let’s delete the partitions and install on a fresh partition.  That’s wierd the delete and format options are greyed out. Â
Ok, well, I’m thinking this must be a driver issue. The setup must not be able to see the drive properly. But, in the window above that it correctly was showing my drive with the existing partition and the correct size and everything. This was not a brand new drive, it was one I had used in another machine.
So, I’m thinking, well, the drive is making a very whiny noise anyways. I don’t really want to use this drive because it’s liable to die. So I grab another drive from a different machine and I get the same results. Again, not a new drive but one that had been in use.
I do some poking around on the internet and find a lot of explanations and possible fixes, but none of them work. I grab the motherboard driver CD and try loading drivers for the SATA controller, but no luck. (On a side note, the ability to load drivers from a USB drive or CD/DVD as opposed to by floppy like XP does is a very cool feature).
My next move is to find a bootable disk that I can use to nuke the partitions on the drive and see if that helps. Bingo! I downloaded Ultimate Boot CD from here. Amongst the many useful tools on the Ultimate Boot CD are a number of Partition tools and I managed to use one to delete all partitions on the drive. After doing so, the Vista installation took off and worked without a problem.
I thought this issue was really strange because the 2 drives that I was trying to use had come from Windows XP installations and had been formatted NTFS. Oh well, it works now and that’s what counts!