Mame Arcade Cabinet – Day 10
More progress! You might be wondering where Day 9 is, well, day 9 took place a couple of weeks ago and I never got around to posting it! I’ll put it up later this week. (Day 9 posted 6/1/08)
When last we left the continuing saga of the Mame Arcade Cabinet back on the update following Day 8 the cabinet had been painted primer grey and the T-Molding still wasn’t done.
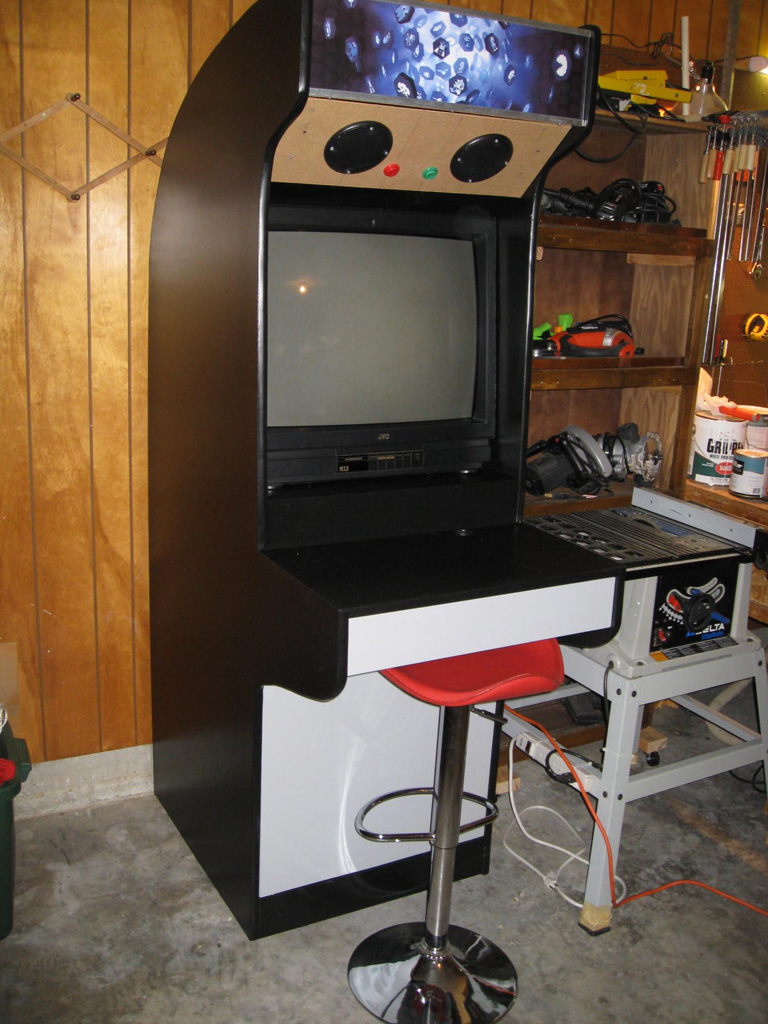
We join the saga on Day 10 and it’s been painted black (most of it), the T-Molding has been installed and I found a TV! It was my first Craig’s List purchase! I had been watching Craig’s list for 25″ TV’s for several weeks and hadn’t really found anything promising. Then I saw this posting on there for a JVC 25″ TV with a good picture, broken remote and for the low low price of $20. So, I contacted the guy and he said he’d let it go for $15 because he was eager to get it out of his house.
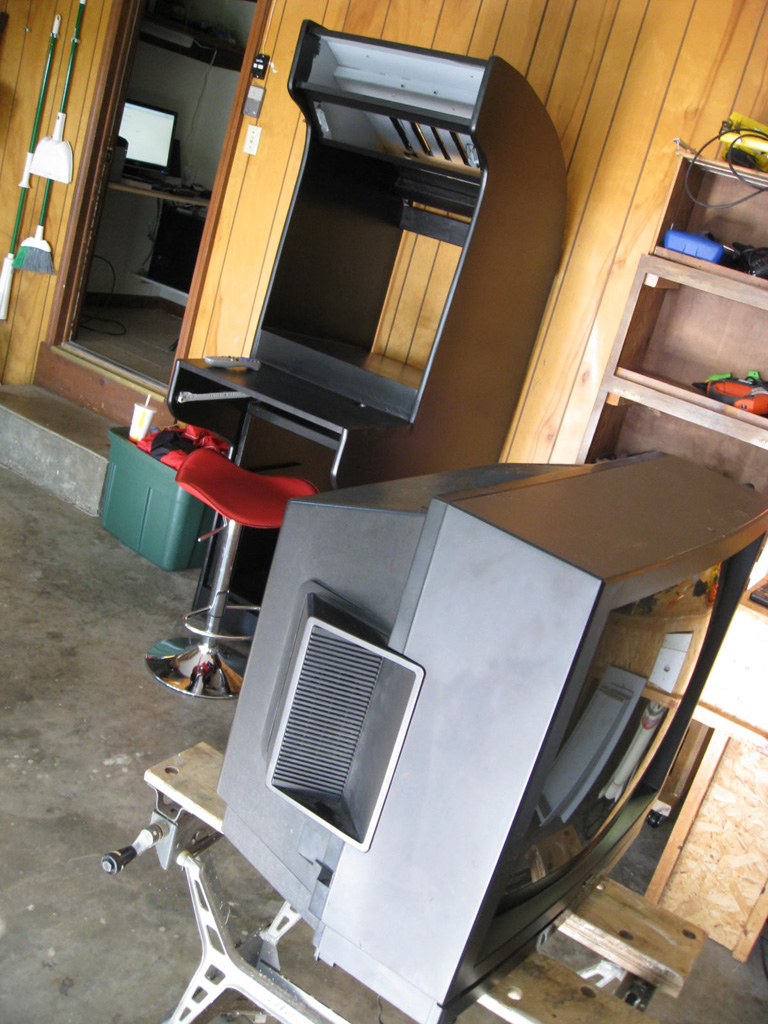
So, I get the TV home and it works great but…it’s 3/4 of an inch to wide to fit in the cabinet! Just 3/4 of an inch!
My first thought was…where’s my Dremel?
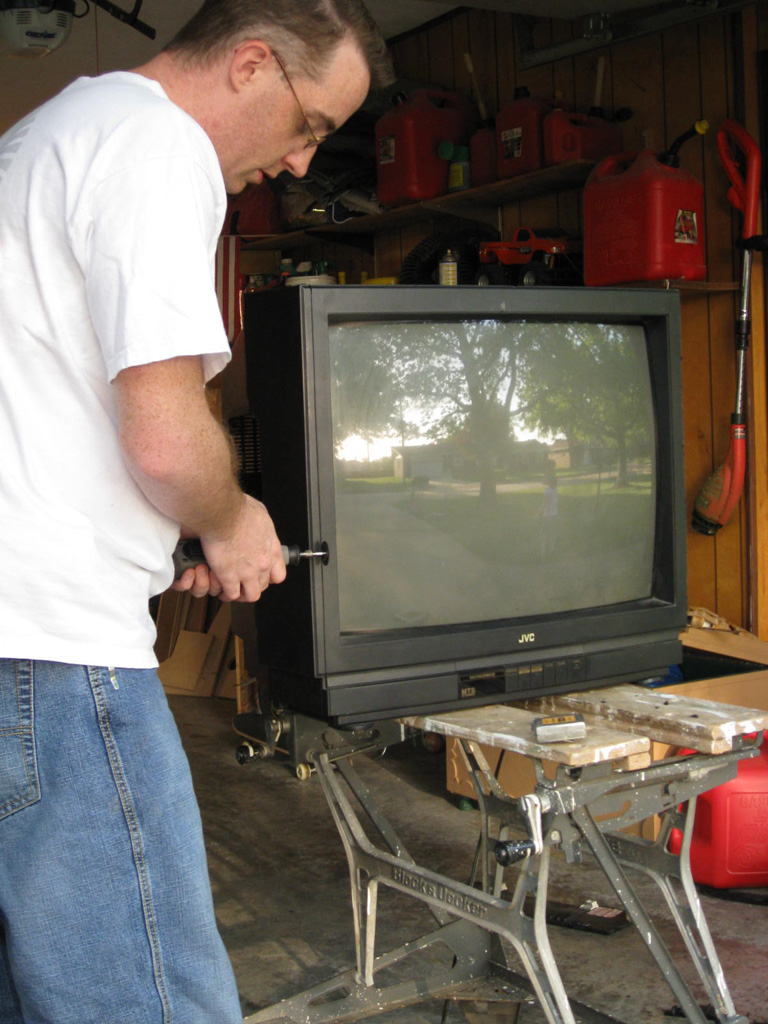

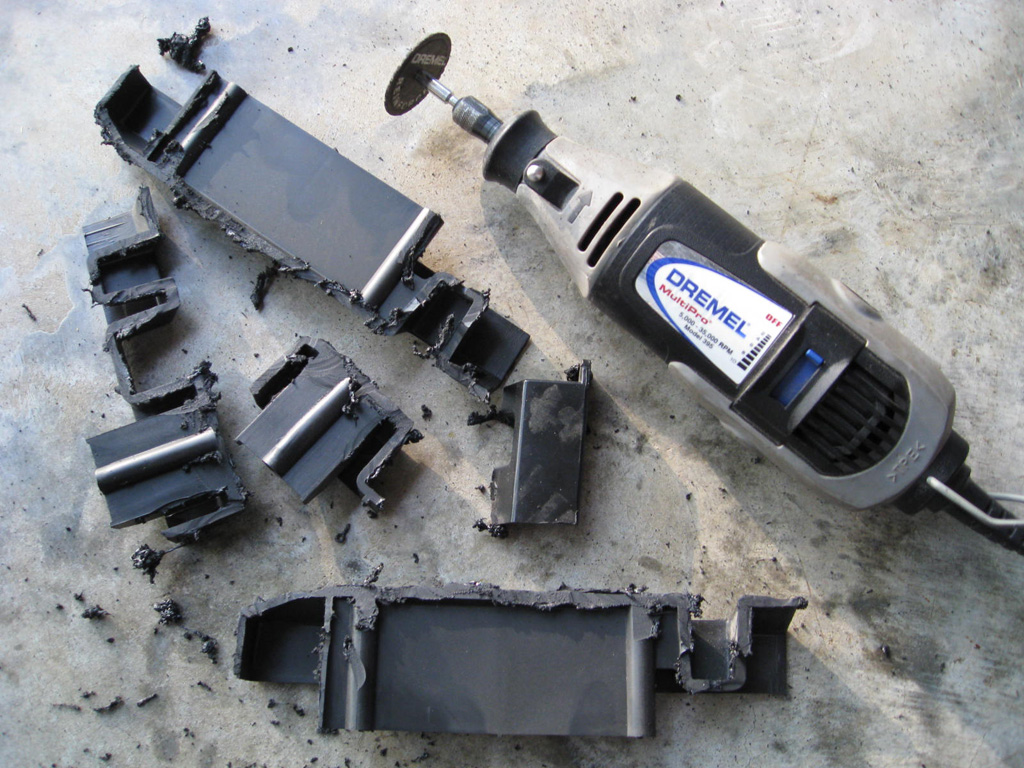
So after a bit of hacking the TV fit into the cabinet nicely. Next I plugged my Satellite TV into it to make sure the thing still worked and it does!

So here it is as it stands. I still need to paint the speaker panel, the front main door, the shelves and a little touch ups here and there. Then I need to get the computer hooked back up with the joystick. Next comes getting a piece of glass that will serve as the bezel in front of the TV as well as some sort of artwork for the sides of the cabinet. Oh, and I need to get the artwork at the top printed by Kinko’s or someone. Currently I just printed it on two sheets of paper on my inkjet printer and put them together, but when the light is on you can see the seams. It’s looking more and more like an arcade cabinet!
Day 10 hours: 2
Next :: Goto Mame Arcade Cabinet – Day 11
Pistols

Dogwoods

We have emerged from a seemingly long, cold and wet winter. I pulled my camera out today for the first time in what seems like months. It felt good to hold it and hear the sound of the shutter. I hope they never get rid of that sound from cameras, there’s something about it that seems to be an intricate part of photography. Anyways, when you add to this yucky cold winter the fact that I’ve been working hard at getting my MCSE (Microsoft Certified Systems Engineer) certification it adds up to no time for shooting. I hope to change this here after I finish my last test which is scheduled in the next couple of weeks. Thanks to you all who continue to visit despite my lack of posting!
Picked

Chalk Drawings

Picking Flowers

Mame Arcade Cabinet – Day 9
Day 9 brings in routing the edges for T-Molding, black paint and wiring switches and lights on the speaker panel.
After my first encounter with the router and doing the T-Molding I was really not looking forward to this part. But, once I got the depth set correctly and went after it, it worked like a charm. I do recommend doing this part before assembly of the cabinet, but since I had only done the primer coats it turned out great. I zipped around the edges and had a good clean groove in no time.
I’m not sure what it is about painting that I don’t like, but I really hate painting. Maybe it’s the monotonous motion of rolling or brushing on the paint, I don’t know. So, I started in on the black paint.
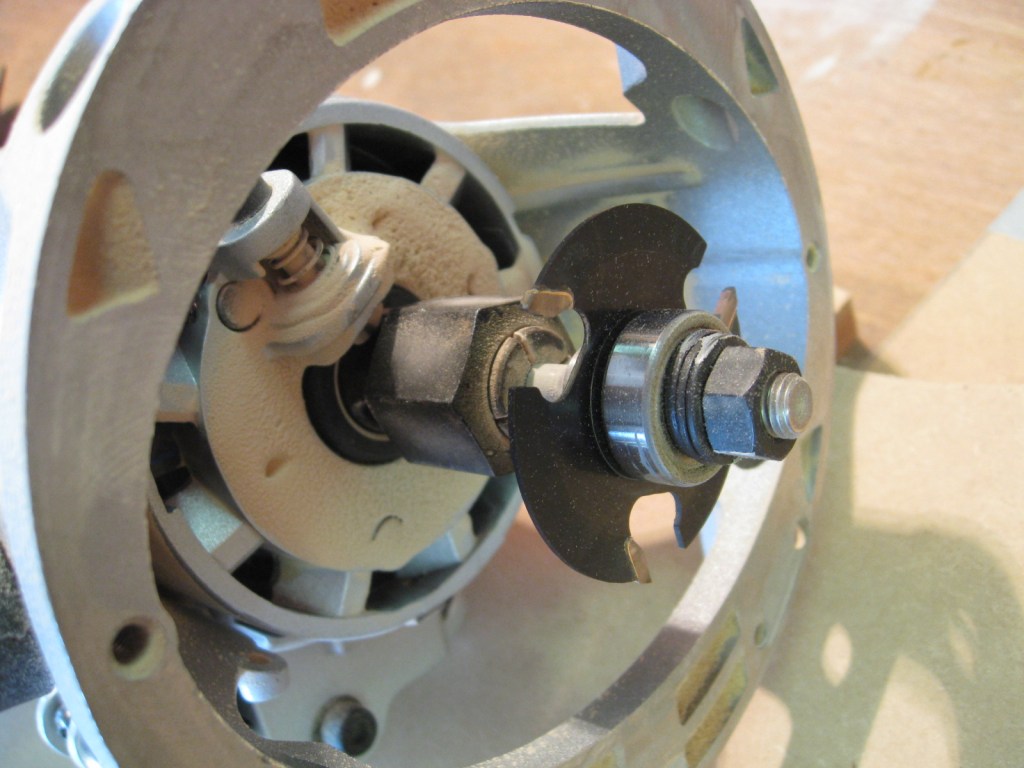
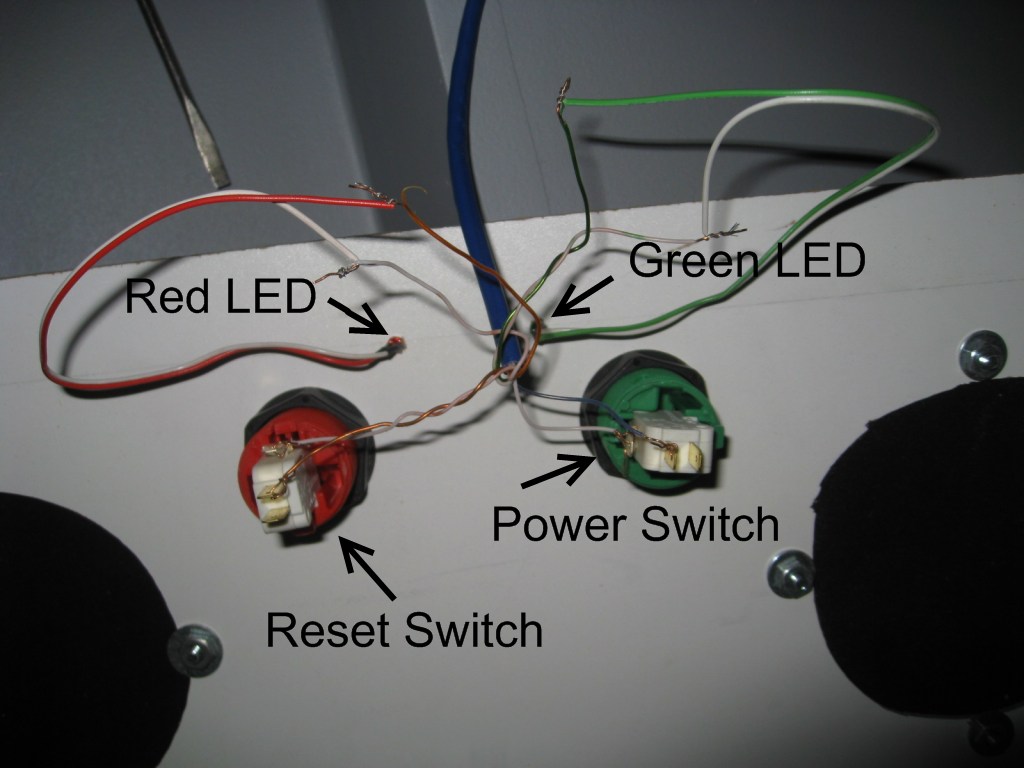
I got bored with painting so I turned my attention to wiring the switches and LED lights on the speaker panel.
I wanted to be able to turn the computer on and off without having to open the front door of the cabinet. So, I took an old computer case and removed the green LED, red LED and the connections running from the power switch and reset switch. The I grabbed a long piece of cat5 cable and connected the motherboard connectors to the ends of each pair of the cat5.
I forgot to get a shot of the wires as they connect to the motherboard on the computer I’m using for the arcade, I’ll add that later. I ran the cable up to where the speaker panel is and connected the wires to the corresponding color pairs that I used at the motherboard end. The LEDs are mounted on the speaker panel by just drilling a small hole and pushing the LEDs into the hole. I’ll get a better shot of the front of the speaker panel later so you can see what I’m talking about.
What you see here is the back of the speaker panel.
One thing I found with the speaker grill is that since my speakers aren’t mounted right up against the speaker panel I was able to see through the speaker grill into the upper area of the cabinet. I took care of this by cutting circles out of a black t-shirt that were slightly smaller than the diameter of the speaker grill.  This let’s the sound through and you can’t see anything behind the speaker grill now!
I still have the drawer, front door and a bunch of touch up painting to do yet.
Day 9 hours: 4 1/2
Next :: Goto Mame Arcade Cabinet – Day 10
Good times
Redirect new computer accounts in Windows Server 2003 domain to a different location

While studying for the MCSE 70-294 test on active directory I ran across this little command that I was previously not aware of. redircmp.exe
So, you can type: redircmp ou=mycomputers,DC=corp,dc=com
Replace the mycomputers with the ou (organizational unit) that you want all new computer accounts to go to. Replace the corp with your domain name and the com with
Pretty cool! I made a new OU where I store my computer accounts in and I always forget that new computer accounts go to the computers ou and it generally takes me a minute or two before I remember. This way new computer accounts will automatically go to the ou of my choice.
Go here to Microsoft’s website for more info on these commands.
You can also use: redirusr ou=myusers,DC=corp,dc=com
This will redirect the location that new user accounts are made in. I don’t use this one, but it is good to know.
The slide 005

The slide 004
The slide 003

Vista Tip – Trouble installing Vista on SATA drive

I was working on one of my computers at home and decided to load Windows Vista on it. I grabbed a copy of Windows Vista Ultimate and thought I’d throw that on it. So, I put in the DVD, boot it up, pick my language, enter the product key and I get the following message: “Windows cannot be installed to this HD space. The partition contains one or more dynamic volumes that are not supported for installation”
Ok, let’s delete the partitions and install on a fresh partition.  That’s wierd the delete and format options are greyed out. Â
Ok, well, I’m thinking this must be a driver issue. The setup must not be able to see the drive properly. But, in the window above that it correctly was showing my drive with the existing partition and the correct size and everything. This was not a brand new drive, it was one I had used in another machine.
So, I’m thinking, well, the drive is making a very whiny noise anyways. I don’t really want to use this drive because it’s liable to die. So I grab another drive from a different machine and I get the same results. Again, not a new drive but one that had been in use.
I do some poking around on the internet and find a lot of explanations and possible fixes, but none of them work. I grab the motherboard driver CD and try loading drivers for the SATA controller, but no luck. (On a side note, the ability to load drivers from a USB drive or CD/DVD as opposed to by floppy like XP does is a very cool feature).
My next move is to find a bootable disk that I can use to nuke the partitions on the drive and see if that helps. Bingo! I downloaded Ultimate Boot CD from here. Amongst the many useful tools on the Ultimate Boot CD are a number of Partition tools and I managed to use one to delete all partitions on the drive. After doing so, the Vista installation took off and worked without a problem.
I thought this issue was really strange because the 2 drives that I was trying to use had come from Windows XP installations and had been formatted NTFS. Oh well, it works now and that’s what counts!
The slide 002

The slide 001

We had a small break in the seemingly forever cold wet winter. We were blessed to actually reach around 62 degrees outside. We jumped at the chance to get outside and soak up a bit of the sun. For the next 5 or 6 posts will be some of the fun we had playing on the slide at a playground near our house. The very next day it turned back to cold and barely hit 35 degrees. Yuck. I believe the temperature this week is supposed to get up to the upper 50’s. I am so ready for spring and summer.
Super simple free cd/dvd burning
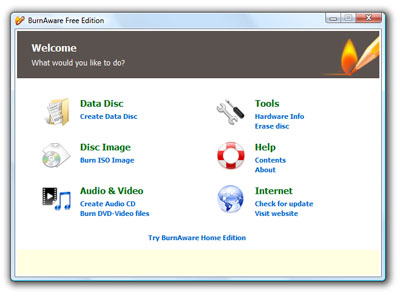
I’ve been a long time Nero user, but lately it seems even my favorite burning software has become so bloated and overfilled with extras that it’s a hassle to just install the beast.
So, when I reloaded my laptop recently I started poking around for an alternative and I found this little free gem called BurnAware Free.
The software is made by GloryLogic. They also have a paid version that has more features like UDF data discs, bootable discs, writing files larger than 4 gig and more. The free version does your typical audio discs, data disks, burn and create iso images and more. Here is a list of differences in the versions.
I like to make my own bootable XP install cd’s and dvd’s so I’ll likely purchase the Home version but for now I’ve been using the Free version and love the less is more approach to the interface. That’s me, less is more. Keep it simple stupid.
Vista Tip – Turn off hibernation
Unlike Windows XP, Vista doesn’t have a handy checkbox for turning off hibernation.
I recently installed TrueCrypt 5 (which is working beautifully) and used it to encrypt my whole C: drive. Since it’s encrypted hibernation does not work.
Well, I kept forgetting that and tried to put my laptop into hibernation.
I found instructions on this site for disabling hibernation which removes the choice from the start menu.
To disable hibernation:
- Click Start followed by All Programs and then Accessories
- On the Accessories menu Right Click on the Command Prompt
- From the drop down menu, Click on the Run Administrator option
- The Command Prompt window will now open
- At the command prompt type: powercfg -H off
To enable hibernation:
- Click Start followed by All Programs and then Accessories
- On the Accessories menu Right Click on the Command Prompt
- From the drop down menu, Click on the Run Administrator option
- The Command Prompt window will now open
- At the command prompt type: powercfg -H on
Cool Firefox Addon – PicLens

Quite possibly the coolest Firefox addon this year is a new one called PicLens. It’s a new way to browse Google Images, Flikr, Yahoo Images, Facebook, Picasa and more. The addon is very quick and super easy to use. It’s not every day you download a piece of software and say “Whoa…”
_

Symantec Liveupdate fails with a LU1863 error – There is not enough free disk space

I use Symantec Backup Exec 12 and Symantec Endpoint Protection Anti-virus and Anti-Spyware products. Recently Liveupdate quit working and it wasn’t downloading virus definition updates. This was normally an automatic process that I didn’t have to mess with, but once I saw the dates on our virus definitions looked old I jumped in to investigate. Running Liveupdate manually I would get an error message that said “LU1863: There is not enough free disk space…”. That’s odd, my server’s C drive has 35gb free, D drive has 130gb and E drive has 1.2 terrabytes free. I’d say that’s plenty of free disk space.
I uninstalled Liveupdate to no avail. I found the Liveupdate config program and emptied the cache again to no avail. After some investigating I found that the LU1863 error could actually be a communications problem, not a hard drive space problem. So, what’s changed lately? Well last week I installed GFI Webmonitor on my network to do some monitoring. Well, that ended up being the culprit. I went to the Whitelist and added *.symantecliveupdate.com and away the Liveupdate went!
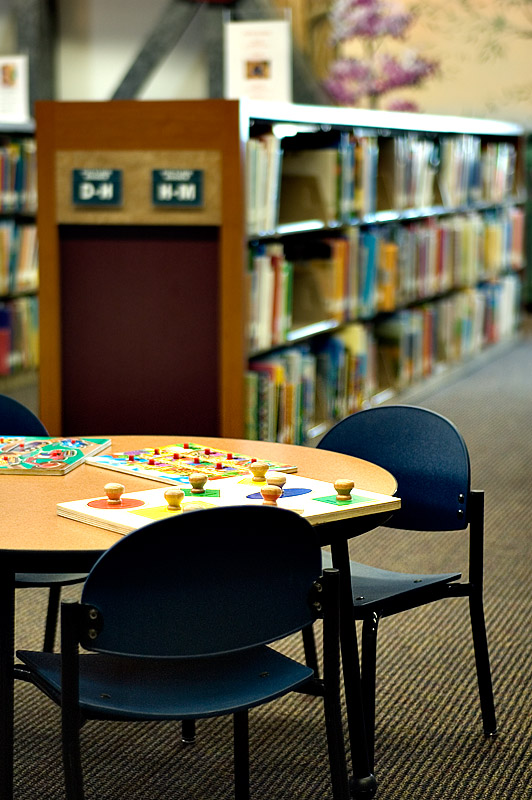
Library time
Mame Arcade Cabinet – Things to do list
Since it’s been to cold to work on the cabinet I thought I would work on a list to help keep track of what I need to do and give me a place for reminders for things I want to do. Hopefully we only have a few more weeks of Winter left and Spring will be upon us. Then I can get down to business!
Goto the main Mame Arcade Cabinet Project page.
To do:
- Route the edges with slot cutting router bit for T-Molding
- Second coat of primer paint
- Add adjustable lights to speaker panel
- Find a 27″ TV to replace monitor
- Get Marquee artwork printed professionally
- Paint the whole thing black
- Attach T-Molding
- Create stencils for side art
- Get coin door for front
- Get glass for front bezel
- Find somewhere to mount speaker volume control
Vista Tip – View thumbnails of Nikon Raw images
![]()
I was surprised when I clicked on a folder of raw images I’d taken with my Nikon D70 in Windows Vista and there were no thumbnails. I thought I had that ability in Windows XP but couldn’t remember if I did something extra to do it. I guess I just expected it to work in Vista. No worries though, after some clicking around I found this page on Nikon’s site with a raw codec for Windows Vista and now I’ve got thumbnails for all those .nef files!
Fun at the lake

_

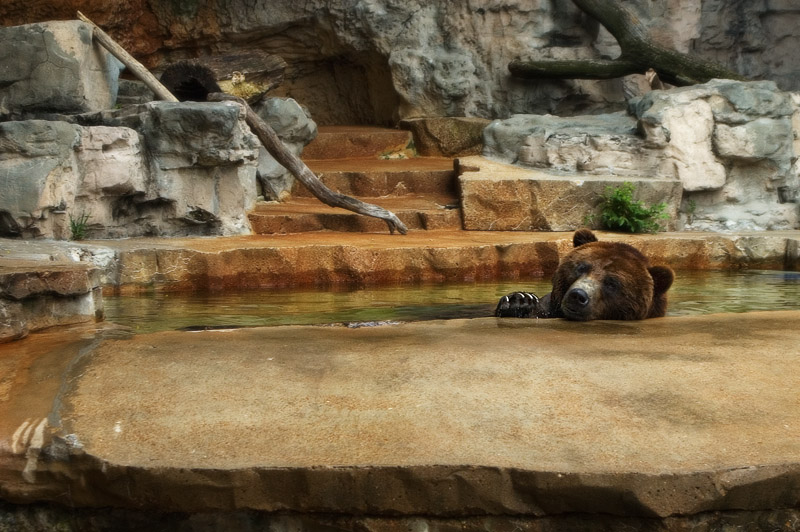
Chillin Bear
Mame Arcade Cabinet Update
Winter has frozen progress on the Mame cabinet. We’ve had a couple of ice storms and it’s been a cold wet Winter. My workshop (which is my garage) isn’t heated so I just haven’t brought myself to work on it.
I did manage to pick up this snazzy chair yesterday. It’s a bar stool with a funky red leather seat. The height is adjustable and I thought it fit the arcade perfectly!
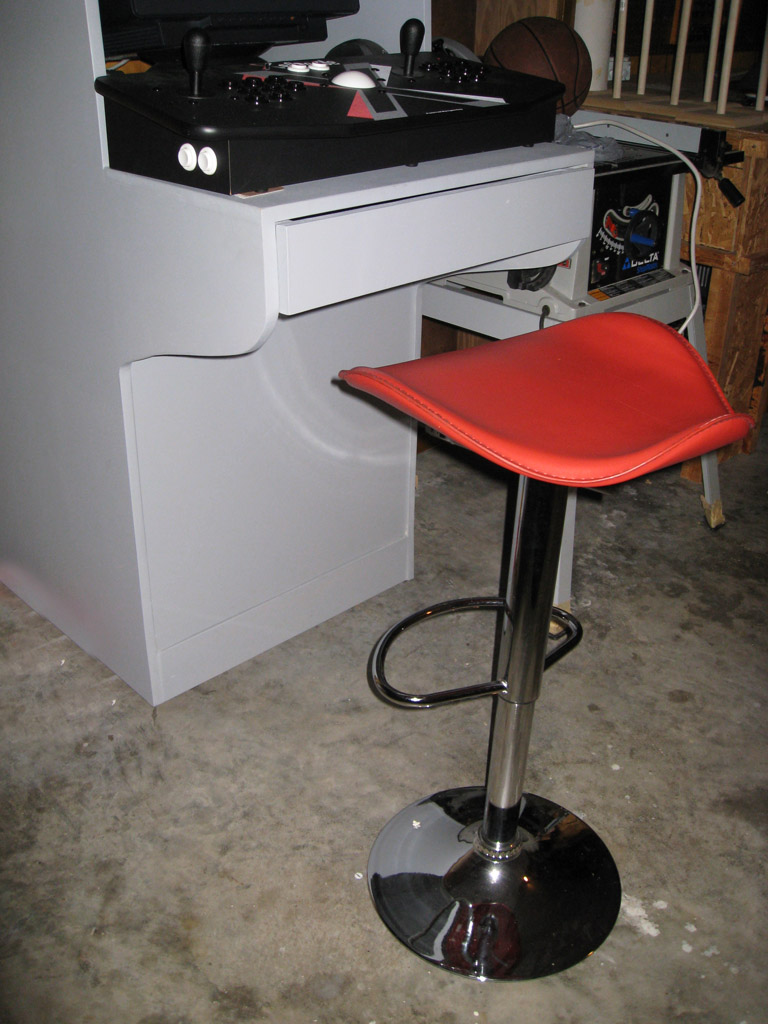
Hopefully we can break out of this cold weather so I can get back to working on the cabinet. I’m still looking for a 27″ TV to put in it. I’ve ran across a couple of them, but their were either to big or didn’t have s-video inputs.
Next :: Goto Mame Arcade Cabinet – Day 9
Ready for Spring

I’ve had enough of Winter. I’m so ready for Spring to thaw us out.
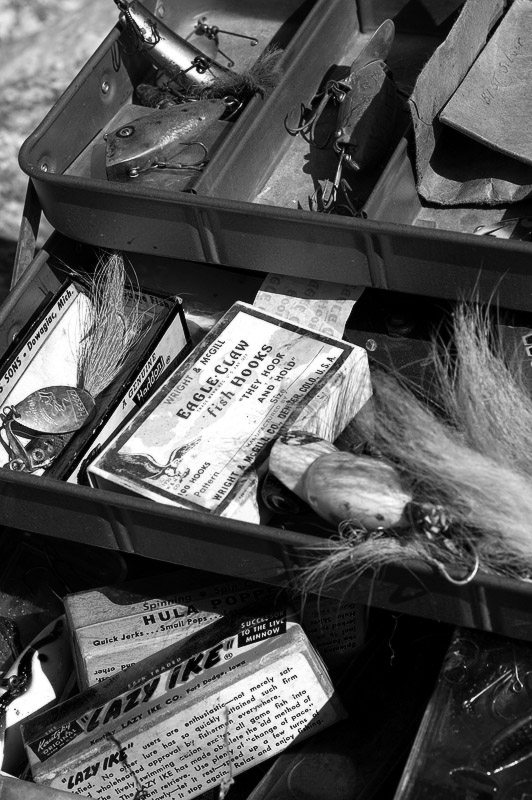
They Hook and Hold
Old Berkley Trilene
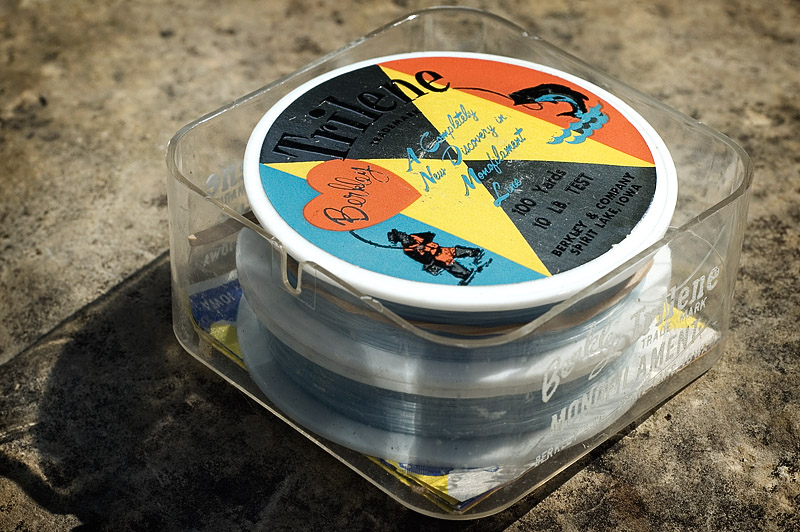
I’m not into fishing, it’s not relaxing and it’s not fun to me! My son loves it, lucky for him he has a Grandpa and a Brother-in-law who likes to fish! My Brother-in-law brought an old tackle box that was his Grandfathers and it had a bunch of old lures and fishing line. Not sure how old it is, but it looks pretty old!